Micro (Seiki) BL-91 restoration

J!m

Veteran and General Yakker
Joined
Dec 24, 2019
Messages
10,983
Location
Connecticut
Tagline
BOT
#61
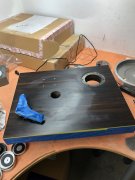
Next project is the finish. The forgotten belt snapped and dropped down off the platter onto the wood surface. After another decade or so it melted itself into the finish.

I have learned that the veneer is paper thin and easy to sant through if you were thinking of refinishing it. I had heard that acetone will remove the belt residue but it also removes the finish. This might be the way to go- wet rag of acetone to wash the clear off so it can be reapplied…maybe tung oil is the answer. This is not a piano Lacquer finish.
 

J!m

Veteran and General Yakker
Joined
Dec 24, 2019
Messages
10,983
Location
Connecticut
Tagline
BOT
#62
Got busy today…

F6A0D6F8-32FD-46AB-9BA9-42EBB9151CA3.jpeg EB1EA15E-16C6-46DE-8FF5-395E313DD372.jpeg 2834FCE4-1935-4458-95BB-04CA16800BF8.jpeg 673CE282-AAD0-4341-8D9D-947D7AAF2D49.jpeg

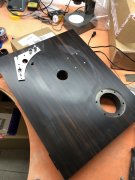
I hit the top with#1 steel wool to remove the melted belt remains (it basically welds into the finish). I also made a dent go away. This had been shipped in the past with the platter in place.

Then I gave it three wet coats of the satin clear- only on the top. I masked the sides off.

We’ll see how bad it came out in the morning..,
 

J!m

Veteran and General Yakker
Joined
Dec 24, 2019
Messages
10,983
Location
Connecticut
Tagline
BOT
#63
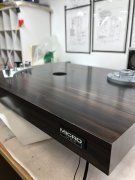
It’s not bad! I think the sheen is a reasonable match. I’ll get it demasked and get some photos.

Meanwhile, I cleaned up the foot cups.

5D7714F1-A5C7-40D2-8FBE-46E23DE4F99D.jpeg

The feet are rubber “bags” with a spring inside. (These guys were clever) I have some more feet inbound from Japan now but those are also used… hopefully I can get four out of the bunch.

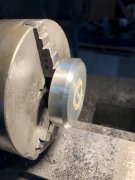
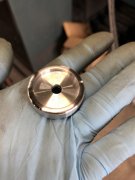
I also cleaned up the 45 adapter while I was at it… got a bit carried away I think.

63272137-050C-45FB-8A87-B36B9590969A.jpeg
 

J!m

Veteran and General Yakker
Joined
Dec 24, 2019
Messages
10,983
Location
Connecticut
Tagline
BOT
#65
9AC92E6D-F9FC-4AC6-9CC0-2DEDA52EF8A4.jpeg

This is where we left off. The motor is lubricated and re mounted, the motor pulley has been polished. Lower control board is mounted and the wiring tidied up underneath. I also started the layout for the voltage switch underneath.

PS I went up to 5.1 ohms on the resistors based on the actual voltage I was getting out of the transformer. I need to verify voltage is correct when the motor is running…
 

J!m

Veteran and General Yakker
Joined
Dec 24, 2019
Messages
10,983
Location
Connecticut
Tagline
BOT
#66
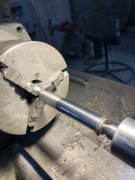
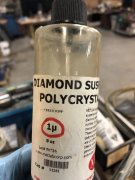
Well, I fired it up today. Dropped the spindle into the plinth, dropped on the platter, ran the new belt around and let it run. Both speeds seem to work. Spindle is making a sound that didn’t run in so I’m going to superfinish the shaft. I found the Diamond suspension so I should be able to get 1 micron or better. I’m also going to replace the steel bearing ball with one of my polymer ones. Plus another oil change…

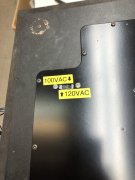
I also modified the steel cover for the bottom to accommodate the voltage switch. Got that painted so it’ll be done tomorrow.

Additional used rubber feet and an original DIN cable are inbound but that’ll be a month probably. I’ll get the bearing done next week and then get back onto the Rega project.

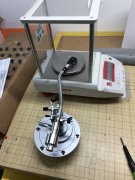
I also need to set the dynamic balance up, or at least see how good or bad it is. I can use the analytical balance we use when we weight pair blades. Measures grams to four or six decimal places. I should be able to dial it in pretty well…
 

J!m

Veteran and General Yakker
Joined
Dec 24, 2019
Messages
10,983
Location
Connecticut
Tagline
BOT
#80
Thanks!

Which lathe? The small one is a Hardinge second operation lathe. The big one is junk now. Because it leaked, they decided to stop adding oil. Lo and behold they broke the gear in the most useful range… I think it swings 24” (but has a gap bed) and six feet between centers I’d estimate. Metric dials on it make it even less friendly to use…
 
Top