
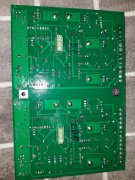
I see what your saying. All my organic filler plugs popped out, his aren't.If you zoom in on the first pic, you can see the PEM's are not all the way flush.
So what's the best way to fix it after pulling the boards? Big heavy iron on top of the nut until the solder melts and the nut settles against the board, then add more solder to close the gaps?
I'd be thinking a old school Weller Expert pistol grip gun right on top the nut. No solder on the tip, just add as needed around the nut.


")