J.A. Michell Prisma restoration

laatsch55

Administrator,
Staff member
Joined
Jan 14, 2011
Messages
74,124
Location
Gillette, Wyo.
Tagline
Halfbiass...Electron Herder and Backass Woof
#61
The shell is about 5/8” plate. The hole is about 5 feet long and well above the waterline but will need to be repaired before we sail again. I think we hit a piling and not the actual bridge, also not sure if vehicle or train bridge. Last time we hit a bridge i heard it was 1/4mil for assessment and repairs...

Shit, I've got trucks built of thicker stuff than that...
 

AngrySailor

Veteran and General Yakker
Joined
Oct 15, 2014
Messages
3,419
Tagline
---not quite right
#62
Need to hear more about how you "bumped into a bridge abutment." Loss of steering? Drunken crew? Bridge abutment suddenly turned in front of you? Don't leave us hanging...
Nothing that exciting. No failures, just river current and dark. We hardly felt anything but our total weight ship and cargo is somewhere around 55,000 metric tons so it doesn’t stop on a dime!

Captain and all crew on watch were breathalyzed, no problems. It’s a really tight spot to get a ship this size into. I think we hit the bridge the Blues Bros. Jumped. Or one right near it.

Lee, these new ships are built lighter but with more strategic engineering than the old ones. The old hulls were around 7/8” plate. The less the ship weighs, the more cargo it can carry and still meet draft restrictions.
 

Attachments

AngrySailor

Veteran and General Yakker
Joined
Oct 15, 2014
Messages
3,419
Tagline
---not quite right
#63
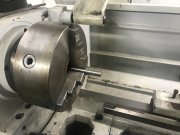
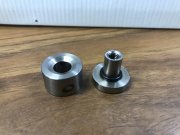
Lift handles/lid closing stops in progress. Found some stainless to work with. The originals were acrylic but I think these will work and look the part. I’m worried about making a mess with glue if I try to make them from acrylic... the inner parts which the lid stops agains the base are in the works right now. Should be finished in a bit.
 

Attachments

AngrySailor

Veteran and General Yakker
Joined
Oct 15, 2014
Messages
3,419
Tagline
---not quite right
#64
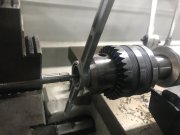
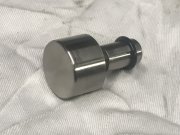
One complete. What a nightmare tapping stainless with the chinessium tooling here. The Rubber o-ring is what will rest on the base. The original had a clear rubber band I believe.
 

Attachments

laatsch55

Administrator,
Staff member
Joined
Jan 14, 2011
Messages
74,124
Location
Gillette, Wyo.
Tagline
Halfbiass...Electron Herder and Backass Woof
#68
BTW , nice job...that's tedious. The guys in our shop call working on smalls.......jewelery...
 

AngrySailor

Veteran and General Yakker
Joined
Oct 15, 2014
Messages
3,419
Tagline
---not quite right
#69
Wasnt the original knurled?
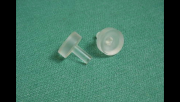
No, they were acrylic and polished. These were on evilbay listed as NOS Michell stock. Priced like it too... I can always remove the one I made and put in clear ones, but the plastics guys was really worried about the glue making a mess there.

It’s a pain working on stuff like this away from home. Minimal tooling, most is junk and the lathe is chinessium too. Most of all I’m just so used to my machine and tooling and know where everything is. I do prefer larger work pieces though. You can actually see what your doing!
 

Attachments

laatsch55

Administrator,
Staff member
Joined
Jan 14, 2011
Messages
74,124
Location
Gillette, Wyo.
Tagline
Halfbiass...Electron Herder and Backass Woof
#70
Ok, I was going by the pictures of the prop rod swivel.. good job on the plastic parts. We do some plastic work. Teflon for shims and some exotic grey stuff we cut for sheaves....
 

AngrySailor

Veteran and General Yakker
Joined
Oct 15, 2014
Messages
3,419
Tagline
---not quite right
#71
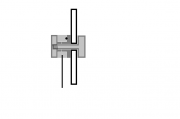
So thinking about the prop rod... I'm planning to make the pivot assembly from 3 pieces which will be stationary in the lid (will clamp tight through the lid) but leave some clearance for the pivoting section the rod attaches too. I was wondering if the rod has any friction or if it falls by gravity when you lift the lid though? I'm kind of thinking this would be best, lift the lid the rod pretty much falls into place. I guess if i want a little friction I could put in a groove for a small O-ring. Here's a highly technical, uber accurate MS-PaintCAD 2D modeled prototype...
 

Attachments

AngrySailor

Veteran and General Yakker
Joined
Oct 15, 2014
Messages
3,419
Tagline
---not quite right
#72
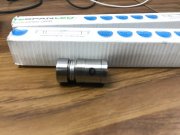
Finished the pivot up today. Going to leave the hole for the rod itself until I’m home to do it on my milling machine. The small washers are simulating therhickness of the cover, the black spot is where the rod will be attached.
 

Attachments

62vauxhall

Veteran and General Yakker
Joined
May 14, 2014
Messages
2,278
Location
Southwest Kootenays BC
Tagline
No such things as bad days, just bad moments
#74
That should do nicely.

Garrard used a spring loaded strut on one of their base/lid combos. I had one but the lid was way far gone.

The pivot/spring, I salvaged to incorporate onto a lid made for a Dual. The strut was a piece of metal rod. Did not know if the strut spring into position or sprung to rest.

I opted for springing out of the way - turns out I got that wrong. No matter, it still worked. I nearly turfed the spring in favour of a friction method as you are fabricating.
 

AngrySailor

Veteran and General Yakker
Joined
Oct 15, 2014
Messages
3,419
Tagline
---not quite right
#75
It's not EXACTLY like the original, but I haven't found a detailed enough picture to really see what they did. It looks like there might be a button head allen bolt through the original? With the reproduction lid, it's not like its 100% original anyways... I doubt anyone who sees it will even notice other than internet gurus. I have some rubber feet that were on it after my uncle removed the original legs, I'll probably put them on for now while I fabricate replicas. Getting pumped up to get the heck off the ship, get home and put the thing together. I have to bring speakers from the shop system in the house, build a cabinet for the vintage gear, build cabinets for the shop... busy month coming up in march.

I ordered an active crossover and cables to hook up the house system. For now, I'm going to use the PL400 to power my stereo speakers (vintage Sansui's, can't remember model # though) ~120hz and up, then use a spare commercial amp (might hide it in the basement room rather than put in the cabinet with the vintage gear) to power the 4x15" cabinets that are being retired from the shop. If/when my Rotel RA-1412 is repaired, it will become the preamp and power the stereo speakers and the PL will move to sub duty.

Tonight I could whittle the prop rod down to ~3/16-1/4" from a piece of 3/4" stainless, or study applied mechanics for an upcoming engineering exam. Neither sounds like much fun:violent2:
 

J!m

Veteran and General Yakker
Joined
Dec 24, 2019
Messages
9,253
Location
Connecticut
Tagline
BOT
#76
For tapping trouble Matetials, I’ve found “tap magic” can offset crappy dull taps to some extent. Helps with drilling too.

BUT it’s corrosive. Good to clean things but remove it and use a proper light oil on anything ferrous.

Edit- old school solution is 50-50 ATF and Acetone. Might be easier to find if you are stuck aboard.
 

AngrySailor

Veteran and General Yakker
Joined
Oct 15, 2014
Messages
3,419
Tagline
---not quite right
#77
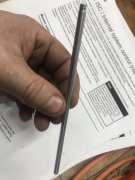
Need a breather from real work so whittling the prop rod down from 3/4” stock. Brain disengaged!
Edit: Jim, good suggestions but our taps are just crap. Could probably cut a better thread with one made from frozen butter.
 

Attachments

AngrySailor

Veteran and General Yakker
Joined
Oct 15, 2014
Messages
3,419
Tagline
---not quite right
#79
Done. That was a lot of light cuts as the diameter got small... now just have to attach this to the pivot. I’m thinking a rubber vacuum plug from one of the many carb kits kicking around the shop will end up being the “foot”.
 

Attachments

Top