HELP! PL400 crackling/static

Sounds good. I have several thousand of those small transistors....
 
If it's still noisy, and you want to try and fix the factory board I have lots of whatever it takes to fix it...
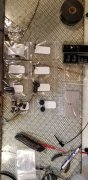
Welp, I still have the problem, so I suppose I should swap a few parts. Would you suggest Q1 and Q2? Anything else? Gepetto mentioned those Q5 pinwheels might be a culprit.
 
You should replace Q1,Q2,Q3,Q4,Q5,Q7,Q10 on each channel. Along with all electolytics. Power supply caps too..
 
After reviewing the thread, you stated you were getting 0.000 at the speaker posts and .2mv, and 16.5 mv at the inputs to the DCP board correct?
 
Yes. Unless I’m misinterpreting something. Those are the numbers. What I see entering the relay now is about the same as the numbers I had at the binding posts before I touched anything.
 
Do you hear a relay click in the DCP board signifying board operation?
 
Then the input measurements should match the speaker post measurements..
 
It should trip seconds after you power up, that closes the contacts on the relay, when DC is present at about 1/2 volt and up it will open the contacts as will powering down,....
 
It should trip seconds after you power up, that closes the contacts on the relay, when DC is present at about 1/2 volt and up it will open the contacts as will powering down,....
Just checked again with probes in place before powering up and the numbers do pretty much match. 0.2mv left, 17.5mv right.
I think when I checked at the posts before, it had maybe already had one of it’s freakouts and opened the relay. My understanding of the DCP is that once open, it stays open until you power off and back on.
 
That's correct. I'll start putting together the care package tonight. What do you have for a soldering Iron? Desolderer or solder sucker? The traces on that board are not forgiving of overheating. You need to melt the solder and get the component OUT!
Cut the leads on the transistors if you can and remove one at a time. Trying to melt all 3 leads and get it pulled exposes those traces to wayyyyy to much heat. On the caps, melt one pad while pushing the cap sideways to get that lead pulled, then do the other. A little cool down between leads is not a bad idea either.
Search and dowload the datasheets for TIS97's, MPSA93's, 2N3439, and 2N5416. Download the datasheets for whatever is in there for transistors now so you can compare pinouts and install the new parts in the correct orientation.
I do have a solder sucker and some copper wick. Recently purchased a KSGER T12 soldering station. Cheap, but seems to hold temp well and came with a nice narrow tip.
Is there a maximum safe temp I should keep in mind when working on this old board?
 
Here ya go Lance, boxing up now.
6----TIS-97's.
5-----MPSA-93's
4----- 2N3439's
2------2N5416
8-------47uf/100volt Nichicon Muse caps
2-------470uf/50 volt Nichicon Muse caps
2-------470uf/ 10 volt Panasonic caps
2--------16,800uf/100 volt PS caps with mounting hardware
4------2 Fin heatsinks
2-------3 Fin heatsinks

Will go out in the morning.
 

Attachments

  • 20200531_202115.jpg
    20200531_202115.jpg
    1.5 MB · Views: 18
Solder suckers and vacuum cleaners are the only thing designed to suck and they do a poor job of it. Many a board has been trashed with them. Solder wick can cause problems as you tend to put too much pressure on the board. Lifted tracks prevail. The Hakko desoldering tool works great. The knockoffs at 1/2 the price may work.
 
Solder suckers and vacuum cleaners are the only thing designed to suck and they do a poor job of it. Many a board has been trashed with them. Solder wick can cause problems as you tend to put too much pressure on the board. Lifted tracks prevail. The Hakko desoldering tool works great. The knockoffs at 1/2 the price may work.
I will look into it. Thanks!
 
Solder suckers and vacuum cleaners are the only thing designed to suck and they do a poor job of it. Many a board has been trashed with them. Solder wick can cause problems as you tend to put too much pressure on the board. Lifted tracks prevail. The Hakko desoldering tool works great. The knockoffs at 1/2 the price may work.

If you have a de-soldering tool, there is no need to do so but have you ever tried a flux pen with solder wick? That seems to substatially reduce the time a hot tip is in contact with a connection. Might be just plain luck but (touch wood) since using that method I haven't lifted a pad or trace off a board.
 
And always sacrifice the component you are desoldering before you begin desoldering. Cut each component lead before you desolder it, leaving only the leads that you can easily remove with tweezers while heating quickly with your iron. Cut the lead close to the component body since you are throwing it away anyway. Much easier to take one lead at a time out than multiple leads at the same time. Then use solder wick or sucker to remove the remaining solder. The original PL board were single sided so solder wick is an easy choice once the component lead is out of the way.
 
On rare occassions there is an exception to the sacrifice rule. The exception is if you want to verify the component has failed out of circuit. I recently had a 400 that had 80 VDC of offset at turn on, sometimes. Sometimes the channel worked fine. Q1 and Q2 were the initial suspects. They tested normal in circuit with a DVM. I pulled them and put them on a curve tracer. One of them was breaking down around 20 volts. With new devices in place the amp worked fine every time I turned it on. Had I sacrificed the transistor to pull it there would have been a lingering doubt if the channel was truly fixed. Otheriwse a cracked solder joint or other component could be the problem. How often does this happen? I see it less than once every 5 years. Take those odds to Vegas.
 
Back
Top