
Michael F
Journeyman
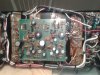
Damn I wish my care package had gone thru. It had all the caps you needed for both channels, C3, C11, C6, C15, C16. All Nichicon KZ (Muse) series. In the factory boards, you can drill out the component thru holes. I use a cutting torch cleaning set which is a pin vise with very small drill bits. Those caps I'm not familiar with. Should get you up and running though. Got a cap checker on your meter??
That would have taken care of all the electrolytics, with nice caps too. Were those values altered as well? But if one were to change only one cap it would be C6.
I`ll put the new ones in along with the diodes. While not Muse, they must be better than whats in there now I suppose.
")