You are using an out of date browser. It may not display this or other websites correctly.
You should upgrade or use an alternative browser.
You should upgrade or use an alternative browser.
Glen's 700 series II build
- Thread starter grapplesaw
- Start date
- Joined
- Jan 14, 2011
- Messages
- 75,871
- Location
- Gillette, Wyo.
- Tagline
- Halfbiass...Electron Herder and Backass Woof
Yeah, that was just in general Dennis.....mines uber-cool too...
grapplesaw
Veteran and General Yakker
I know.
Have you ever seen a Series II with the wood sides and the gun metal top? That is a hot enclosure. Speaking of hot.
Sorry Glen - I just can't help myself.
I better not show this form to my wife! LOL
She is a good sport so no problem here just may have to retire early.
grapplesaw
Veteran and General Yakker
I hope everyone had a good thanks giving regardless of the weeks craziness.
I have 7 kids and 14 grandkids on both the east and west coast. 5 kids and all grandkids were born in the good old USA. We had lots of conversation with them this week. We usually go to Oregon for Thanks giving but it did not workout this year.
So the week was a bust on this little project.
Got the Pl14-20 put together tonight. I will work on finishing backplates this weekend if all goes well
Post photos tomorrow with some added features.
Night all
grapplesaw
Veteran and General Yakker
This looks complete now
I added some heat sinks to Q1 and Q2
Any one have preference for cleaning product to remove excess Soldering Rosin from Board?
90% Isopropyl alcohol.
D13L/R cannot be installed for a full comp application.
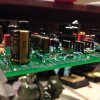
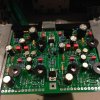
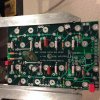
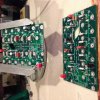
View attachment 17678View attachment 17679View attachment 17680
90% Isopropyl alcohol.
D13L/R cannot be installed for a full comp application.
grapplesaw
Veteran and General Yakker
Thanks Joe90% Isopropyl alcohol.
D13L/R cannot be installed for a full comp application.
I will remove the diodes
Glen
Thanks Joe
I will remove the diodes
Glen
Nice job. Heatsinks are not required on Q1 and Q2 but is does no harm. Those are sized primarily for the inrush current which you want to be fast for no thump on turn on.
grapplesaw
Veteran and General Yakker
Mod to Backplate
Here is the nearly completed mod for Series two
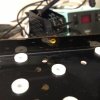
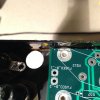
After narrowing the boards with a router on a router table I filed and sanded the edges to very fine finish .I looked for any copper trace jumping between layers before coating the edges with some 5 minute Epoxy. I double coated then to yield +/- 1/32 of coating.
The boards now have only about .005 -.010 clear
I then added a length of 1 mi Kapton tape to the frame ( anyone think I should double or triple thickness please let me know)
So now ready to put together
Thanks to Joe for all his tips and Eagle eyes (I missed omitting some Diodes) on this procedure I can now move forward.


Last edited:
grapplesaw
Veteran and General Yakker
Here is the tape I used. Thanks Dennis
3M™ Polyimide Film Electrical Tape 92
Typical Value
US units (metric)
Color Amber
Adhesive Thermosetting Silicone
Backing Thickness 1.0 mils (0,025 mm)
Overall Thickness 3.0 mils (0,076 mm)
Tensile Strength 30 lbs / inch width (53 N / 10 mm)
Elongation (% at break) 55% minimum
Electrolytic Corrosion Factor
(3M internal test method) 1.0
Adhesion to Steel 25 oz / inch width (2,8 N / 10 mm)
Comparative Tracking Index
(IEC Method 112) CTI Group IIIb
Printable Yes
Dielectric Breakdown > 7,500 V
Insulation Resistance > 1,000,000 Ohms
Last edited:
- Joined
- Jan 14, 2011
- Messages
- 75,871
- Location
- Gillette, Wyo.
- Tagline
- Halfbiass...Electron Herder and Backass Woof
Here is the nearly completed mod for Series two
After narrowing the boards with a router on a router table I filed and sanded the edges to very fine finish .I looked for any copper trace jumping between layers before coating the edges with some 5 minute Epoxy. I double coated then to yield +/- 1/32 of coating.
The boards now have only about .005 -.010 clear
I then added a length of 1 mi Kapton tape to the frame ( anyone think I should double or triple thickness please let me know)
So now ready to put together
Thanks to Joe for all his tips and Eagle eyes (I missed omitting some Diodes) on this procedure I can now move forward.
View attachment 17681View attachment 17682View attachment 17683View attachment 17684View attachment 17685
His eyes have saved me from more than one disaster...
Here is the nearly completed mod for Series two
After narrowing the boards with a router on a router table I filed and sanded the edges to very fine finish .I looked for any copper trace jumping between layers before coating the edges with some 5 minute Epoxy. I double coated then to yield +/- 1/32 of coating.
The boards now have only about .005 -.010 clear
I then added a length of 1 mi Kapton tape to the frame ( anyone think I should double or triple thickness please let me know)
So now ready to put together
Thanks to Joe for all his tips and Eagle eyes (I missed omitting some Diodes) on this procedure I can now move forward.
View attachment 17681View attachment 17682View attachment 17683View attachment 17684View attachment 17685
Look at where that AC inlet sits, right on the sheet metal fold, Geez. That is a big production no-no. The reins must have been very tight at PL during that period of time.
grapplesaw
Veteran and General Yakker
I was going to use some sjoow 14/2 for the power cord and still may. I will have to rework that little bugger I guess.Look at where that AC inlet sits, right on the sheet metal fold, Geez. That is a big production no-no. The reins must have been very tight at PL during that period of time.
I was going to use some sjoow 14/2 for the power cord and still may. I will have to rework that little bugger I guess.
That will be a challenge Glen given that spacing...
grapplesaw
Veteran and General Yakker
So we have the Backplates ready from wires now. I am of to my shop to change out the old 2n1303 cans.
I was a little confused about D2 but it appears it is not required any more. Am I correct?
View attachment 17687 View attachment 17688
D2 is a 'DO NOT POPULATE' location Glen
So we have the Backplates ready from wires now. I am of to my shop to change out the old 2n1303 cans.
I was a little confused about D2 but it appears it is not required any more. Am I correct?
View attachment 17687 View attachment 17688
Nice assembly work.
grapplesaw
Veteran and General Yakker
Spot on JoeThat will be a challenge Glen given that spacing...
I will have to deal with now .
Choices
-use original setup 16/2
-replace with 14/2 and open up the original chassis fitting
-put in new plug at fan plug
I am thinking the middle one.
grapplesaw
Veteran and General Yakker
Nice assembly work.
thanks
I haven't done this for a long time. Just a little repair hear and there.
I bough a dual pencil station - Weller 80 watt x2 setup for this job off Ebay ( my favorite store)
It is very helpful to get the heat when needed with two at a time and reduces overheating the component. I set one at 650 and the other at 690. Got quite good at feeding solder with one hand while holding the #2 iron. I can grap the lower temp one for smaller parts and the higher one for bigger items and both to get those jumpers and resistors glued to the backplate.
Cans are now switched from old 2n3403's
Off to cut wires


