PL7000S2

George S.

Veteran and General Yakker
Joined
Feb 18, 2020
Messages
4,739
#41
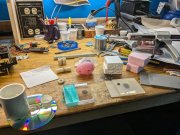
The mixing nozzles finally arrived
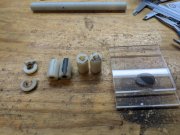
Testing the adhesive on some decades old Nylon 101 bushing stock, plexiglass, lexan, polypropylene, polyethylene, Styrofoam, and Owens Corning pink foam board (and a few misc ).
Would be nice to try gluing a busted Remington Nylon 66 rifle stock.
Directions say it cures in 24 hours, but some have reported it takes a little longer.
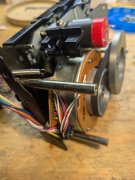
I'll let'em sit a couple days and see if it's worthy of use on the transport pulleys.
 

Attachments

George S.

Veteran and General Yakker
Joined
Feb 18, 2020
Messages
4,739
#44
Waited over 24 hrs. Decided may as see the results.
Total failure on all plastics but the nylon and plexiglass.
Works well on the nylon, and we can ignore the plexiglass as there are better adhesives for it.
I glued two Nylon 101 bushings end to end, and another two side by side.
They were lightly cleaned with alcohol, but no sanding. Wanted to see what the adhesive will do for the "lazy" hobbyist or tech.
Well, I couldn't get get them apart by hand. Went to the garage and used the vice and a screwdriver thru the bush center and snapped them apart.
It did take some force, more than expected, so that's good.
However, there is no sign the adhesive penetrated the nylon for a "weld" similar to welding steel. Adhesion is only at the surface with no depth into the nylon.
So. It's far better than JB Weld. Based on the force it took to seperate the pieces, I'm going to use it.
With good prep as Jim suggested, it should work well.
Using 3M Scotch-Weld DP 8910 NS Black 45 mL cartridge, Traktronix M50-11/12 gun, Traktronix 10:1 dual piston plunger, 3M Scotch-Weld EPX mixing nozzles 45 mL orange square.
 

Attachments

J!m

Veteran and General Yakker
Joined
Dec 24, 2019
Messages
9,831
Location
Connecticut
Tagline
BOT
#45
I just fixed the grille for the rover with JB Weld for plastics. Seemed to do okay on the cracks but that’s a low stress application.

IMG_0800.jpeg IMG_0809.jpeg

I gave it five hours before I painted. Still viscous at five minutes so I’d treat that as pot life.

Prep was acetone wash of surfaces and epoxy was applied liberally to the crack, both sides outside it and a ways back from the crack site to provide support.
 

George S.

Veteran and General Yakker
Joined
Feb 18, 2020
Messages
4,739
#46
Used 4 nozzles as it has appx a 5 min working time and it sets up inside the nozzles.
Partially filled the brake drums and both sides of the tape counter pulley using toothpicks to place it and work it in for good contact and no air bubbles
Kept it off the bearing surfaces that thrust washers touch and the clutch face a felt disc contacts.
It's looking good after sitting a couple hours.
20 years from now I want this to still be working properly.
Not a easy deck to work on and only want to do this once.
 

Attachments

George S.

Veteran and General Yakker
Joined
Feb 18, 2020
Messages
4,739
#48
Using a FBM9.0 capstan belt.
A FBM9.3 was slightly too loose.
Using a SBO3.2 counter belt.
A SBO2.9 was too tight.
Using a ST.670 tire, sanded to reduce it's width.
All sourced from TurntableNeedles.com
Hopefully this'll help someone in the future.
The build continues.
 

Attachments

laatsch55

Administrator,
Staff member
Joined
Jan 14, 2011
Messages
74,424
Location
Gillette, Wyo.
Tagline
Halfbiass...Electron Herder and Backass Woof
#50
Starting transport reassembly.
I used a little too much adhesive in the brake drums, it contacts the housing screws.
Pressed and rotated the brake drum to mark the interference in the adhesive.
Machined it out with a Dremel ball burr.
The adhesive machines nicely.
All good.
Its the little things isn't it George??/
 

George S.

Veteran and General Yakker
Joined
Feb 18, 2020
Messages
4,739
#51
Time to start making the cap list.
Twelve boards in the beast and looks like eleven of the boards have caps.
I've exceeded my monthly audio "budget", so I'll get the pinch rollers sent off to Terry next month.
I see a easy 2-3 months of part time work getting the boards ready.
Also want to straighten out the wiring. Some of it needs uncrossed and shortened.
I'll leave the heads off until I get the rollers.
Going to ask around and see if I can borrow a better microscope than I have.
 

Attachments

Last edited:

Elite-ist

Administrator, (and straight-up pimp stick!)
Staff member
Joined
Jun 12, 2010
Messages
9,837
#55
The technician - I use - spent some time on my Phase Linear 7000 Series Two deck, just a lttle over a year ago. He had to disassemble the idler mechanism and the reel motor to clean them. He also had to get the Microscan system working. I can't remember what that entailed.

I was at his place, yesterday, to pick up and drop off a few components and he said a customer of his dropped off his Pioneer CT-F1250 for servicing and mentioned to the tech he has a second-owner PL 7000 S2 with original packing carton and OM. I haven't seen one advetised, locally, since I bought mine in 2019.

20200207_144938_zps3mijsgbi.jpg

Nando.
 

George S.

Veteran and General Yakker
Joined
Feb 18, 2020
Messages
4,739
#56
Beautiful!
Mine won't be as clean as that as the folding face plate screws were loose and it got scratched by the lower chassis.
I do see some suspect vias on the microscan board that look like they need rework. Looks like they soldered in short pieces of stranded wire to form the via connecting each side of the board. I need to research the microscan boards and see if the vias were plated or not.
I just found the first evidence someones been in here before me. This is on the control board. There are additional areas of sloppy work on this board. Luckily nothing that can't be easily repaired.
Thanks for the photo Nando!
 

Attachments

Gepetto

Administrator
Staff member
Joined
May 15, 2011
Messages
13,663
Location
Sterling, MA
Tagline
Old 'Arn Enthusiast
#57
Beautiful!
Mine won't be as clean as that as the folding face plate screws were loose and it got scratched by the lower chassis.
I do see some suspect vias on the microscan board that look like they need rework. Looks like they soldered in short pieces of stranded wire to form the via connecting each side of the board. I need to research the microscan boards and see if the vias were plated or not.
I just found the first evidence someones been in here before me. This is on the control board. There are additional areas of sloppy work on this board. Luckily nothing that can't be easily repaired.
Thanks for the photo Nando!
That looks like original sloppy work George...
 
Top