Carl182
New Around These Parts
- Joined
- Aug 30, 2021
- Messages
- 22
Hi everyone! Second post ever after my introduction here.
Finally, done with my PL400 restomod. Extremely satisfied with the overall audio experience.
Proud of having made it with my own hands and brains.
Thank you White Oak and Wattsabundant for your work and dedication.
Also, thank you all at Phoenix Audio for the warm welcome and all the invaluable information (including anger outbursts and Nav-babes, all of it!).
Doing this post now to have your comments, thoughts, and critiques; and to hopefully give back something to the newcomers as well!
Enjoy!

WHAT I HAD
- Phase Linear 400 (Series 1, 220-240 VAC)
- Serial No.1243-193A (Unit No.193 built on December 1973)
- Matching power supply capacitor date codes (STM / 91M85RC92 / 5900MFD 85VDC lot code 11607346).
- Matching transistor date codes (Phase Linear “blue label” lot code 7346 – week 46, year 1973).
- Autograph / Name on sticker: “Jesse” (White bar sticker on power cap, with no “classic” orange circular sticker on the inside of frame. More here.).
- Checked for no mechanical or electrical modification: looks like untouched for the last 48 years.
WHY I HAD IT, WHY I DID IT
The unit was just abandoned by the previous owner, a musician, after having burned highly valuable speakers. I have no other background info.
A mutual friend brought it to my attention. One VU meter pegged at turn-up. Some lamps were off.
Checked the original manual, spotted the defect, looks like not worthy per my initial thoughts and general audio approach.
BUT:
I then study Phase Linear’s history and role in audio + I discover Phoenix Audiotape = fuck I’m hooked and here we are, after many hours and EUROs less in my life.
WHAT I DID
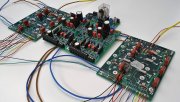
- White Oak PL14
- White Oak Backplanes (Full-comp, Dual Mono wiring)
- Wattsabundant Output Relay Board
- New transistor set (ON Semicon MJ21195G + MJ21196G)
- New thermal interfaces (Bergquist SIL-PAD TSP 900 TO-3)
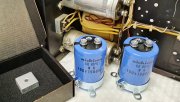
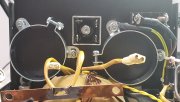
- New rectifier (GeneSiC Semicon 600V 25A metal frame)
- New power supply capacitors (Nichicon 100V 15000uF)
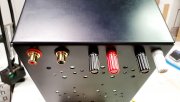
- New speaker binding posts (coherent aesthetics)
- New RCA input connectors (coherent aesthetics)
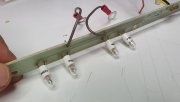
- Relamping (6.3V incandescent bulbs)
- Rock-solid bias @ 0.370V
- All internal rewiring as per WO specs (AlphaWire, Belden)
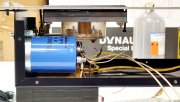
- New mains wiring (Belden CYSD03 3x15 AWG + metal braid shield) with IEC socket termination
- ON/OFF switch (old-school lever, sideways and ON position upwards)
- Integrated / Invisible mains cable holder and chassis grounding
- Deep aesthetical cleaning
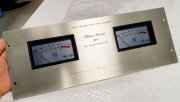
- Sanding/Repainting of VU Meter frames
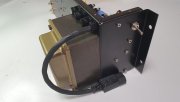
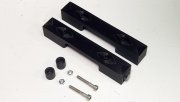
- Custom-designed 3D-printed handles (details below)
- Restoration Logbook: includes original manuals and service bulletins (courtesy Wattsabundant), WO+WA instructions (not sharing elsewhere due the profound respect I nurtured for their work), BOM and invoices of new parts, 250+ step-by-step photos as a next-owner-courtesy (we never really “own” these things).
WHAT’S NEXT
- Trying to figure out the LEFT VU Meter problem (see 3rd post on this thread - any help super welcomed!);
- Thinking of implementing WO LED Board;
- Trying to sell all original innards (OG wiring ass.y, transistors, RCA + speaker posts all of which are still perfectly usable, power caps, rectifier, mains wire) (pm an offer I can’t refuse if interested, I’m giving priority here before the bay).
HOW IT SOUNDS
I don’t think I have the right setup and audio approach to let this horse run in the wild – maybe I’m wrong, change my mind. My system currently has a minimalistic and hi-efficiency approach: driving my WOPL400 I have a DIY Nelson Pass B1 NuTube Buffer, while right after I’ve a pair of DIY Fostex FE166e backloaded horns (2.0 full-range, 8 ohms as minimum value along the spectrum, 94 dB/W(m) efficiency).
Sure enough, the setup will express every noise and imprecision, but the meters would not even move, at reasonable listening levels.
That said, after some burn-in hours, I’m highly impressed by its behavior.
It surely is an excellent performer.
Precise yet smooth and round at all frequencies, with a non-existent noise floor.
Maybe a bit too relaxed, but still, it is too early to say and maybe the overall system isn’t just right for it.
Will try to update sooner or later!
RELEVANT PICTURES FROM LOGBOOK WITH NOTES
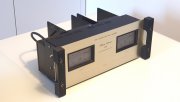
Jesse now, front view in amazing Technicolor.
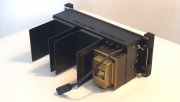
Back view. Mains wire and socket, switch, caps + rectifier screwheads, handles and central cover WO screw.
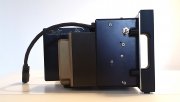 Side view. Slight angle inclination thanks to the integrated feet in the custom handles. Looks great standing on the floor as the system centerpiece.
If you look into the abyss, the abyss looks back into you.
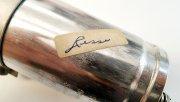
"Jesse".
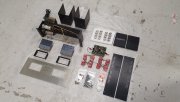
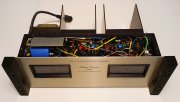
Let me see you strip down to the bone.
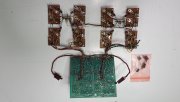
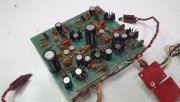
Incredibly intact after 48 years. Still solid substrates, solder joints and sleeves.
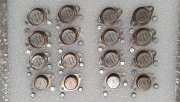
Time to go. Classic PL XPL909s (blue labels) and RCAs on mica and goop. Weird to have 5 slot screws among the others. "Craftmanship".
Finally, done with my PL400 restomod. Extremely satisfied with the overall audio experience.
Proud of having made it with my own hands and brains.
Thank you White Oak and Wattsabundant for your work and dedication.
Also, thank you all at Phoenix Audio for the warm welcome and all the invaluable information (including anger outbursts and Nav-babes, all of it!).
Doing this post now to have your comments, thoughts, and critiques; and to hopefully give back something to the newcomers as well!
Enjoy!

WHAT I HAD
- Phase Linear 400 (Series 1, 220-240 VAC)
- Serial No.1243-193A (Unit No.193 built on December 1973)
- Matching power supply capacitor date codes (STM / 91M85RC92 / 5900MFD 85VDC lot code 11607346).
- Matching transistor date codes (Phase Linear “blue label” lot code 7346 – week 46, year 1973).
- Autograph / Name on sticker: “Jesse” (White bar sticker on power cap, with no “classic” orange circular sticker on the inside of frame. More here.).
- Checked for no mechanical or electrical modification: looks like untouched for the last 48 years.
WHY I HAD IT, WHY I DID IT
The unit was just abandoned by the previous owner, a musician, after having burned highly valuable speakers. I have no other background info.
A mutual friend brought it to my attention. One VU meter pegged at turn-up. Some lamps were off.
Checked the original manual, spotted the defect, looks like not worthy per my initial thoughts and general audio approach.
BUT:
I then study Phase Linear’s history and role in audio + I discover Phoenix Audiotape = fuck I’m hooked and here we are, after many hours and EUROs less in my life.
WHAT I DID
- White Oak PL14
- White Oak Backplanes (Full-comp, Dual Mono wiring)
- Wattsabundant Output Relay Board
- New transistor set (ON Semicon MJ21195G + MJ21196G)
- New thermal interfaces (Bergquist SIL-PAD TSP 900 TO-3)
- New rectifier (GeneSiC Semicon 600V 25A metal frame)
- New power supply capacitors (Nichicon 100V 15000uF)
- New speaker binding posts (coherent aesthetics)
- New RCA input connectors (coherent aesthetics)
- Relamping (6.3V incandescent bulbs)
- Rock-solid bias @ 0.370V
- All internal rewiring as per WO specs (AlphaWire, Belden)
- New mains wiring (Belden CYSD03 3x15 AWG + metal braid shield) with IEC socket termination
- ON/OFF switch (old-school lever, sideways and ON position upwards)
- Integrated / Invisible mains cable holder and chassis grounding
- Deep aesthetical cleaning
- Sanding/Repainting of VU Meter frames
- Custom-designed 3D-printed handles (details below)
- Restoration Logbook: includes original manuals and service bulletins (courtesy Wattsabundant), WO+WA instructions (not sharing elsewhere due the profound respect I nurtured for their work), BOM and invoices of new parts, 250+ step-by-step photos as a next-owner-courtesy (we never really “own” these things).
WHAT’S NEXT
- Trying to figure out the LEFT VU Meter problem (see 3rd post on this thread - any help super welcomed!);
- Thinking of implementing WO LED Board;
- Trying to sell all original innards (OG wiring ass.y, transistors, RCA + speaker posts all of which are still perfectly usable, power caps, rectifier, mains wire) (pm an offer I can’t refuse if interested, I’m giving priority here before the bay).
HOW IT SOUNDS
I don’t think I have the right setup and audio approach to let this horse run in the wild – maybe I’m wrong, change my mind. My system currently has a minimalistic and hi-efficiency approach: driving my WOPL400 I have a DIY Nelson Pass B1 NuTube Buffer, while right after I’ve a pair of DIY Fostex FE166e backloaded horns (2.0 full-range, 8 ohms as minimum value along the spectrum, 94 dB/W(m) efficiency).
Sure enough, the setup will express every noise and imprecision, but the meters would not even move, at reasonable listening levels.
That said, after some burn-in hours, I’m highly impressed by its behavior.
It surely is an excellent performer.
Precise yet smooth and round at all frequencies, with a non-existent noise floor.
Maybe a bit too relaxed, but still, it is too early to say and maybe the overall system isn’t just right for it.
Will try to update sooner or later!
RELEVANT PICTURES FROM LOGBOOK WITH NOTES

Jesse now, front view in amazing Technicolor.

Back view. Mains wire and socket, switch, caps + rectifier screwheads, handles and central cover WO screw.
 Side view. Slight angle inclination thanks to the integrated feet in the custom handles. Looks great standing on the floor as the system centerpiece.
If you look into the abyss, the abyss looks back into you.

"Jesse".

Let me see you strip down to the bone.


Incredibly intact after 48 years. Still solid substrates, solder joints and sleeves.

Time to go. Classic PL XPL909s (blue labels) and RCAs on mica and goop. Weird to have 5 slot screws among the others. "Craftmanship".
Last edited:

