Timmienator
Journeyman
- Joined
- May 24, 2021
- Messages
- 61
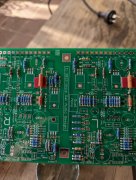
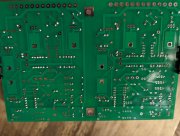
All resistors were checked with a dmm before installing on the board. I even went as far as to try and match values in left and right channels if they were slightly out in value.

All resistors were checked with a dmm before installing on the board. I even went as far as to try and match values in left and right channels if they were slightly out in value.
Sniff
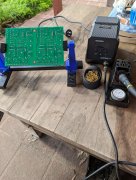
I decided to start out at the low end of the temp range and work up from there. I figured more damage could be done with too much heat than not enough.
And yes I will admit that it is a project for experienced persons but hey there's only one way to learn.
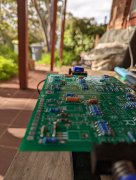
Yup, same here. Carefully install, solder, and trim each clearly labeled packet. I measured nothing. Just carefully installed everything with regard to placement and polarity building the boards. Figured Joe had everything bagged and labeled correctly. He did. No issues on all three amps. Joe's kits are perfection!i built mine by installing one of joes pack at a time...then solder and trim...your mileage may vary...keep up with pics...the pros here will keep you in the center of the road...greasy side down!!!
650°…We generally use 700 deg F. Hopefully other members will comment.
Semiconductors especially…...resistors can take quite a bit of heat...other components not so much...
More fun than building a Heathkit! But seriously, the kitting of parts, labeling and instructions/pictures are all top-notch.Joe's kits are perfection!
I look at the color bands, but don’t individually measure them. Joe knows what he’s doing when he packages the kits- never had a discrepancy.Yup, same here. Carefully install, solder, and trim each clearly labeled packet. I measured nothing. Just carefully installed everything with regard to placement and polarity building the boards. Figured Joe had everything bagged and labeled correctly. He did. No issues on all three amps. Joe's kits are perfection!
Heathkit was a pain in the sphincter…More fun than building a Heathkit! But seriously, the kitting of parts, labeling and instructions/pictures are all top-notch.
More fun than building a Heathkit! But seriously, the kitting of parts, labeling and instructions/pictures are all top-notch.