You are using an out of date browser. It may not display this or other websites correctly.
You should upgrade or use an alternative browser.
You should upgrade or use an alternative browser.
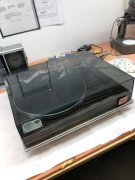
Rega Planar 3 Upgrade(?) path
- Thread starter J!m
- Start date
J!m
Veteran and General Yakker
J!m
Veteran and General Yakker
More progress photos:
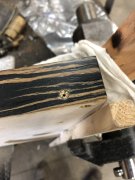
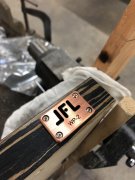
Emblem mounting (this is not the correct one, but same size and material)
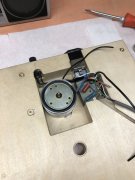
Wiring sorted out.
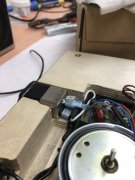
note the male spade which will provide ground to all metal parts (not the arm). The wire in that connector runs to the power switch bezel.
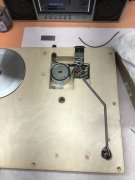
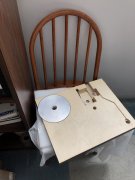
A lot of inserts went in today. I hope the plate lines up properly…

Emblem mounting (this is not the correct one, but same size and material)


Wiring sorted out.

note the male spade which will provide ground to all metal parts (not the arm). The wire in that connector runs to the power switch bezel.

A lot of inserts went in today. I hope the plate lines up properly…
Bob Boyer
Veteran and General Yakker
Love the idea to have the main leveler on one corner, if that's what the big disc on the bottom is. I noticed it peeking out from the base in an earlier photo.
J!m
Veteran and General Yakker
Yes; and it is backlit when the power is on.
J!m
Veteran and General Yakker
Actually, no, Bob.
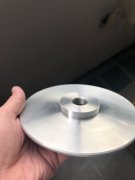
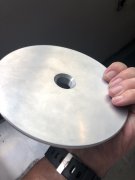
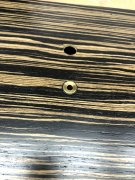
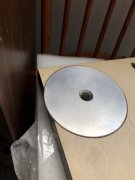
That disc peeking out is the bottom nut for the tonearm. There is a Michel nut on top, so you can adjust VTA without raising or moving the table at all. Not sure it would work "on the fly", but maybe... Leveling of the table is accomplished by three adjustable cones on the bottom.
And today I received the last pieces to finish this damn thing! Maybe more pictures later today.
J!m
Veteran and General Yakker
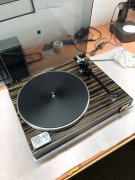
Okay! Finally done!!!
I decided to keep the standard Rega cables, and not go for my upgraded wiring (yet). Those decisions were before I had the BL-91 and I do not expect this will better that…
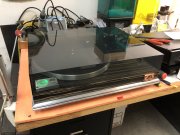
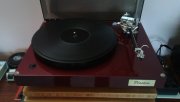
Not horrible looking...
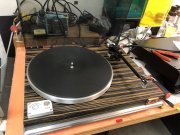
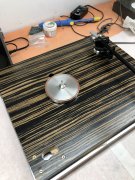
Tango Spinner platter (additional finishing by me) with Tango Spinner sub-platter (additional super-finishing of the shaft by me) with the polymer thrust plate on the end. This rides on my polymer bearing ball, and is bathed in synthetic oil... Dual drive belts and adjustable belt tension via rear knob. Motor rides in an aluminum pod to shield RF (should upgrade to steel for EM shielding as well). Motor is isolated from pod via rubber; pod is isolated from plinth (it contacts the bottom layer of the sub-plinth).
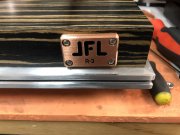
Solid copper name plate of course.
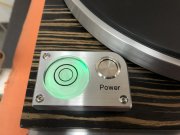
Proper metal power switch, not original plastic held in via duct tape. Level is backlit when the table is on. Plays any record, provided it is a 33-1/3 RPM record.
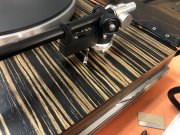
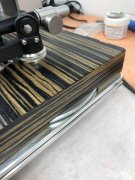
Rega RB 300 with a Benz-Micro Silver cartridge. I may play with the dynamic tracking force this time (I always ran it static balance). Disc just above the sub-plinth is to tighten the arm. Knurled nut between arm and plinth is the Michell VTA nut, to raise the arm. My disc allows this to be adjusted without disturbing the table.
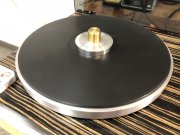
Old record weight I made has been recycled...
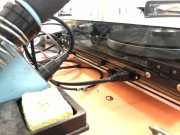
Standard IEC cord (with ground!) has a line filter for the incoming AC. Mains fuse (not fopund on stock Rega(?). Small knob is to adjust belt tension.
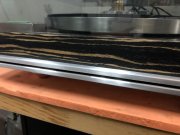
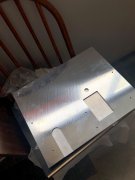
Constrained layer sub-plinth. Various componets are attached to various layers, to enhance isolation. Three cone feet (height adjustable) are on the bottom.
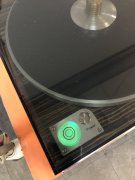
Subtle green glow lets you know it's on without being obnoxious.
Weight: 30 pounds, 8.5 ounces as shown.
I decided to keep the standard Rega cables, and not go for my upgraded wiring (yet). Those decisions were before I had the BL-91 and I do not expect this will better that…

Not horrible looking...

Tango Spinner platter (additional finishing by me) with Tango Spinner sub-platter (additional super-finishing of the shaft by me) with the polymer thrust plate on the end. This rides on my polymer bearing ball, and is bathed in synthetic oil... Dual drive belts and adjustable belt tension via rear knob. Motor rides in an aluminum pod to shield RF (should upgrade to steel for EM shielding as well). Motor is isolated from pod via rubber; pod is isolated from plinth (it contacts the bottom layer of the sub-plinth).

Solid copper name plate of course.

Proper metal power switch, not original plastic held in via duct tape. Level is backlit when the table is on. Plays any record, provided it is a 33-1/3 RPM record.

Rega RB 300 with a Benz-Micro Silver cartridge. I may play with the dynamic tracking force this time (I always ran it static balance). Disc just above the sub-plinth is to tighten the arm. Knurled nut between arm and plinth is the Michell VTA nut, to raise the arm. My disc allows this to be adjusted without disturbing the table.

Old record weight I made has been recycled...

Standard IEC cord (with ground!) has a line filter for the incoming AC. Mains fuse (not fopund on stock Rega(?). Small knob is to adjust belt tension.

Constrained layer sub-plinth. Various componets are attached to various layers, to enhance isolation. Three cone feet (height adjustable) are on the bottom.

Subtle green glow lets you know it's on without being obnoxious.
Weight: 30 pounds, 8.5 ounces as shown.
Last edited:
NeverSatisfied
Chief Journeyman
Well done Jim, should be a real performer and is certainly a stunner to look at. 
Vintage 700b
Chief Journeyman
Jim,
Outstanding work, absolutely beautiful craftsmanship!
Outstanding work, absolutely beautiful craftsmanship!
J!m
Veteran and General Yakker
Thanks guys!
plastico
New Around These Parts
Hi Jim. I noticed your link for here on the Vinyl Engine site. Man, I did the same as you for my P3, only I just added top shelf parts to the Quest plinth. You went off the cliff with your build! I always wondered about adding a plate to the underside. Did you finish your bearing experiment yet?
Cheers, Doug
Cheers, Doug
J!m
Veteran and General Yakker
Welcome to the dark side, Doug!
The bearing ball testing is ongoing.
I did the "crush" test early on, and then I followed up with my preferred oil manufacturer to ensure compatibility. Currently, this table and my BL-91 are both using my polymer bearing ball and I'm quite pleased with it so far.
The bearing ball testing is ongoing.
I did the "crush" test early on, and then I followed up with my preferred oil manufacturer to ensure compatibility. Currently, this table and my BL-91 are both using my polymer bearing ball and I'm quite pleased with it so far.
plastico
New Around These Parts
J!m
Veteran and General Yakker
Looks clean, but did you keep the Rega switch? I'm not a fan of that switch...
I like the name plate and the bumpers for the dust cover. I did this on my BL-91, but I used tiny felt dots and put them on the cover, not the plinth.
And you have a much nicer arm than I have.
I like the name plate and the bumpers for the dust cover. I did this on my BL-91, but I used tiny felt dots and put them on the cover, not the plinth.
And you have a much nicer arm than I have.
plastico
New Around These Parts
Yea, I kept the switch. It was about 2 years ago the switch failed, but I had another in my stash. I subsequently took the failed switch apart and fixed it. Great job on your switch by the way! I mounted the motor with Herbies double sided sticky Grungebuster , since my Micheal Lim outboard mount didn't fit. And you know what? I can't tell the difference.
I got the plate made at a trophy shop. But yours looks like the business! As far as the arm, it is an end game arm! The bumpers come in different heights, and I needed that for the Audiomods arm. Now, what about that plate mounted on the bottom?
Cheers, Doug
I got the plate made at a trophy shop. But yours looks like the business! As far as the arm, it is an end game arm! The bumpers come in different heights, and I needed that for the Audiomods arm. Now, what about that plate mounted on the bottom?
Cheers, Doug
J!m
Veteran and General Yakker
Mine? Constrained layer sub plinth.
If you look back through here, you’ll see the construction. Aluminum plates with water-jet cut rubber in between.
If you look back through here, you’ll see the construction. Aluminum plates with water-jet cut rubber in between.
Bob Boyer
Veteran and General Yakker
Wow! Great looking table, Jim! Nicely done. I'll be curious to see how you like it compared to the BL-91.
J!m
Veteran and General Yakker
Thanks, Bob. I’m curious too.

