PL700 Rebuild

Overundr1

Journeyman
Joined
Sep 12, 2024
Messages
142
#61
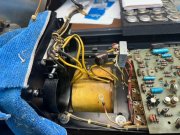
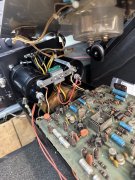
Tackled the rusty main cap mayhem this morning. That blue header plate showed signs of arcing from the main caps and I did not like the way it was designed so have a new buss bar coming from WOPL. In the meantime cleaned out all the rust, new mounting screws, painted the mounting clamps and ready for the bridge and bar to arrive.
Before
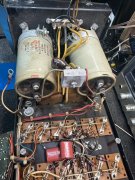
1730148602950.jpeg
After
1730148636742.jpeg

Also found and installed and wired proper green led's with chromium bling factor applied.
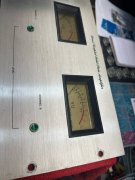
1730148701113.jpeg

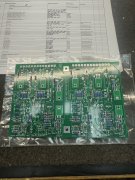
About ready to start on the WOPL control board, enjoying the build immensely
Kind of curious, once she is tested what she will do do my set of Bose 901 series 4 all re-foamed and ready to go. The most I have drove them with so far is around 125wpc, will see if they can handle a many man output lol.
 

Gepetto

Administrator
Staff member
Joined
May 15, 2011
Messages
13,943
Location
Sterling, MA
Tagline
Old 'Arn Enthusiast
#62
Tackled the rusty main cap mayhem this morning. That blue header plate showed signs of arcing from the main caps and I did not like the way it was designed so have a new buss bar coming from WOPL. In the meantime cleaned out all the rust, new mounting screws, painted the mounting clamps and ready for the bridge and bar to arrive.
Before
View attachment 83973
After
View attachment 83974

Also found and installed and wired proper green led's with chromium bling factor applied.

View attachment 83975

About ready to start on the WOPL control board, enjoying the build immensely
Kind of curious, once she is tested what she will do do my set of Bose 901 series 4 all re-foamed and ready to go. The most I have drove them with so far is around 125wpc, will see if they can handle a many man output lol.
Hi Lee, if I knew you needed the cap clamps, I would have sent you a brand new pair with the order I shipped out today.
 

Overundr1

Journeyman
Joined
Sep 12, 2024
Messages
142
#63
Lost count of how many mummified spiders have been eradicated during the build, how sloppy lol.
Used some of my vht header paint on those clamps, if they discolor again I probably will have other things to worry about.
And finally for those who follow these things my Sony Da2801 replacement modules work and will help save those phono preamps (Luxman used them too) from going to the landfill.
 

Hexis22

Chief Journeyman
Joined
Dec 28, 2022
Messages
675
Location
Wisconsin
#64
If you haven’t already noticed, you will need to drill two holes in the original housing for mounting the new control board. The original board used 4 mounts on the perimeter, the new board uses 2 in the center.

The 2 original lower mount holes can be used for mounting the bias transistors with P-Clamps to the housing.

You should also think about how to mount the rectifier to a heat sink if not reusing the blue plate.
 

Overundr1

Journeyman
Joined
Sep 12, 2024
Messages
142
#65
Good point. Issue I have with that blue plate is how easily a short could occur. Current thinking is to measure the new capacitor machine screws and order nylon transistor gaskets (a shouldered nylon spacer) and nylon washers to ensure there is no chance of a short. The original fiber washers are so compressed and brittle that they basically are not re-useable. I was going to use the new WOPL buss bar and fabricate a standoff for the rectifier until a heatsink was mentioned. Greatly appreciate the heads up.
 

laatsch55

Administrator,
Staff member
Joined
Jan 14, 2011
Messages
74,823
Location
Gillette, Wyo.
Tagline
Halfbiass...Electron Herder and Backass Woof
#66
Use a 1" x 1/8" copper bius bar and mount the. BR directly to it...plenty heatsink.
Bananas of various destructive lengths!!!

The 901's can deep throat that bitch....
 

Overundr1

Journeyman
Joined
Sep 12, 2024
Messages
142
#67
That's funny. Have a restored SX1980 that I will not subject to the Bose challenge as it has the original output transistor packs and although I have rebuilt two other 1980's with the EW mods do not want to do it again. My G9000 comes pretty close at 180wpc but is NOT happy with anything less than 8 ohm loads, likewise when I had the Spec 2. So enters the PL-700 with all those lovely TO-3 outputs and an apparent don't give a darn about loading attitude. Glad the shop is far enough removed from the house that significant other will not have to alternate between yelling turn it down and grabbing the Hummels in the china cabinet :)
 

laatsch55

Administrator,
Staff member
Joined
Jan 14, 2011
Messages
74,823
Location
Gillette, Wyo.
Tagline
Halfbiass...Electron Herder and Backass Woof
#69
We did a lot of free lance stress testing in the early days, eventually some of it was condoned...
 

laatsch55

Administrator,
Staff member
Joined
Jan 14, 2011
Messages
74,823
Location
Gillette, Wyo.
Tagline
Halfbiass...Electron Herder and Backass Woof
#70
LAnd.....a 700 does concern itself with a 4 ohm load and run HARD.... use plenty of fan and use 8 amp rail fuses and they run outta gas at 775 per....
 

Overundr1

Journeyman
Joined
Sep 12, 2024
Messages
142
#71
Presents arrived today from WOPL and Hexis22
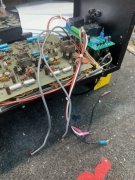
New meter drive harness using silicone fine strand 18guage wire. Terminating in resistor diode string all sealed in heat shrink fittings and sleeves. Also shielded input wires ready for the new board.
Installed the ac feed lines from the new bridge from WOPL (brown wires) to connect to the speaker relay board along with the input ground wire and the others already there.
Removed old main caps and bridge. assembled new bridge to capacitor wires. Interesting find, as I was taking out the old caps and bridge found that one of the transformer wires although appearing to be properly soldered was actually loose making contact only through wire tension. Ended up using 18 gauge female spades to crimp and solder the transformer leads (along with the relay board feeds) then soldering the crimp connectors to the bridge legs with full heat shrink to avoid excessive heating of the bridge studs during soldering. Joe has a new bridge buss on the way and that area will be done.
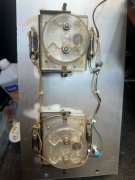
Also finished wiring up the green led's on the front panel. At this point will begin assembling the WOPL control board. Slow and steady progress.

Any spotting of errors or better mousetrap ideas are most certainly welcome. Once the new board installed and tested will neaten up all the wiring of course.


1730257410939.jpeg

New led's wired in, all the original lamps are still functional will leave them in for now

1730257428129.jpeg

Waiting on the WOPL buss bar :)

1730257445294.jpeg

Tip for the day - - - do NOT drop one of the meter nuts behind the bench, finding it was a royal pita.
and - - - even my 230watt soldering gun had a tough time with those transformer solid copper wires.
 
Last edited:

Overundr1

Journeyman
Joined
Sep 12, 2024
Messages
142
#73
Just realized I do not have any of those chassis to-92 transistor mounting straps. Of course cannot figure out where to order them or even what they are called online. Any suggestions would be appreciated.
 

Hexis22

Chief Journeyman
Joined
Dec 28, 2022
Messages
675
Location
Wisconsin
#75
Just realized I do not have any of those chassis to-92 transistor mounting straps. Of course cannot figure out where to order them or even what they are called online. Any suggestions would be appreciated.
Unfortunate you did not realize sooner, I could have included some in my shipment of other parts.
 

Gepetto

Administrator
Staff member
Joined
May 15, 2011
Messages
13,943
Location
Sterling, MA
Tagline
Old 'Arn Enthusiast
#79
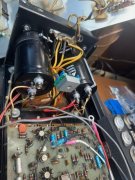
Main cap area complete, about 1/2 done with the control board.
View attachment 84019 View attachment 84020
Lee
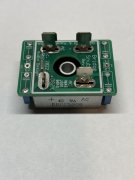
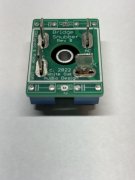
It probably won't matter much in your application but the caps on the snubber board are designed to be soldered on the backside of the board, in the shadow of the bridge rectifier. In that way, it keeps them out of the way of the wiring activity on the top side of the snubber board. IMG_7383.jpg IMG_7384.jpg
 

Overundr1

Journeyman
Joined
Sep 12, 2024
Messages
142
#80
Was a might snug sir however no real problem other than those monster transformer solid core wires not behaving at first
 
Top