Phase Linear P-580 Speakers

timmydawg

New Around These Parts
Joined
Apr 26, 2021
Messages
20
#1
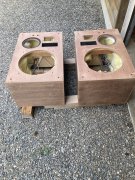
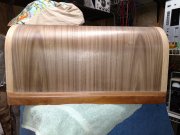
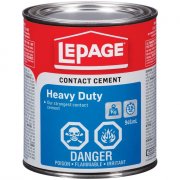
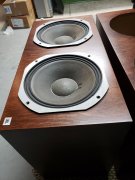
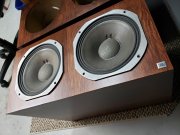
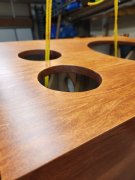
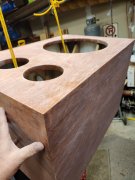
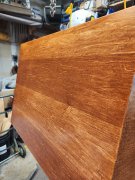
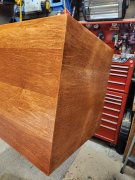
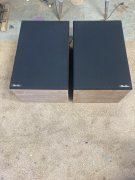
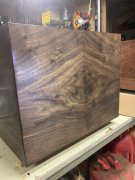
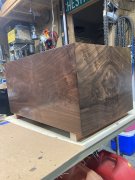
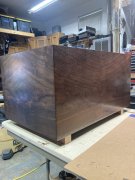
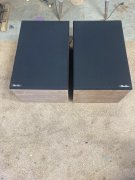
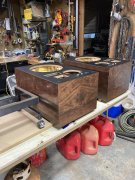
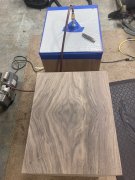
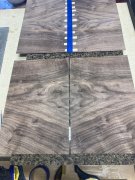
I have a pair of the Phase Linear P-580 speakers that I have been wanting to restore, when I purchased the speakers the cabinets veneer was thrashed, the woofers needed to be re-foamed, Fortunately the Midrange speakers and the tweeters were still in good shape. I think the first thing that I did was to remove all of the speakers and send the woofers out to be re-foamed, the surrounds for that size woofer was unobtainable so the speaker surrounds were fashioned with a splice. I Had found out later that the TAD woofer has a cloth surround and that could have been used but would have changed the sound for better or worse I am not sure. Maybe if I am not happy with the surround that used a splice I will change to the cloth surround. When I pulled out the speakers I noticed some small black pellets all over the inside of both speakers so at some point in time mice had resided in them, all of the dampening material had to be removed and wires checked for nibble marks and replaced as needed and it was needed!! Hey not a big deal I got a good deal on the speakers and I bought them as a project so they were what they were. Now came the fun part veneer, I had purchased all of the veneer that a wood workers store had when they no longer wanted to deal with selling veneer Thank you internet sales! The veneer was mostly figured walnut and some cherry . All I had to do was figure out how to veneer speaker cabinets. I decided that it would be a good idea to test the process first and my first attempt was a colossal F---up. The walnut is figured so it is wavey , all the clamps in China is not going to hold it flat. I had to learn how to flatten veneer a little mix of glycerin, H2O & alcohol paired with a couple granite slabs flattened the veneer quite nicely. The next step was to learn how to book match the veneer, then bag the veneer as it is the only way to consistently veneer each side of the speaker. The process uses a HVAC Vacuum pump , cold press veneer glue, some Tacky tape, thick plastic, PEM film, Matting and a special vacuum fitting and there you have it. IMG_1789.jpeg IMG_1789.jpeg IMG_1782.jpeg IMG_1746.jpeg
 

WOPL Sniffer

Veteran and General Yakker
Joined
Aug 10, 2015
Messages
11,522
Location
Minnie-Soda
Tagline
Screw it
#2
I have a pair of the Phase Linear P-580 speakers that I have been wanting to restore, when I purchased the speakers the cabinets veneer was thrashed, the woofers needed to be re-foamed, Fortunately the Midrange speakers and the tweeters were still in good shape. I think the first thing that I did was to remove all of the speakers and send the woofers out to be re-foamed, the surrounds for that size woofer was unobtainable so the speaker surrounds were fashioned with a splice. I Had found out later that the TAD woofer has a cloth surround and that could have been used but would have changed the sound for better or worse I am not sure. Maybe if I am not happy with the surround that used a splice I will change to the cloth surround. When I pulled out the speakers I noticed some small black pellets all over the inside of both speakers so at some point in time mice had resided in them, all of the dampening material had to be removed and wires checked for nibble marks and replaced as needed and it was needed!! Hey not a big deal I got a good deal on the speakers and I bought them as a project so they were what they were. Now came the fun part veneer, I had purchased all of the veneer that a wood workers store had when they no longer wanted to deal with selling veneer Thank you internet sales! The veneer was mostly figured walnut and some cherry . All I had to do was figure out how to veneer speaker cabinets. I decided that it would be a good idea to test the process first and my first attempt was a colossal F---up. The walnut is figured so it is wavey , all the clamps in China is not going to hold it flat. I had to learn how to flatten veneer a little mix of glycerin, H2O & alcohol paired with a couple granite slabs flattened the veneer quite nicely. The next step was to learn how to book match the veneer, then bag the veneer as it is the only way to consistently veneer each side of the speaker. The process uses a HVAC Vacuum pump , cold press veneer glue, some Tacky tape, thick plastic, PEM film, Matting and a special vacuum fitting and there you have it. View attachment 83301 View attachment 83301 View attachment 83300 View attachment 83299
I use the Paper Backed veneer and the Heat-Loc glue and iron it on with excellent results. The Vacuum Bag method is a pain in the ass and the bags are expensive as is a good vac pump (which I have). Bagging a set of SQUARE, Sharp edged speakers will give you fits AND leaks.


16206.jpeg IMG_20200331_065657682 (2672 x 2004).jpg IMG_20201218_021420966 (2672 x 2004).jpg IMG_20210218_094805592 (2672 x 2004).jpg
 

Mohawk

Chief Journeyman
Joined
Oct 29, 2019
Messages
724
Location
Ontario Canada
#4

timmydawg

New Around These Parts
Joined
Apr 26, 2021
Messages
20
#10
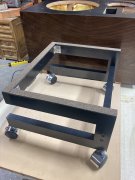
Glass bead blasted the speaker stands that I found on Flea bay, polished up the casters and was able to save the Phase linear sticker on the stands.
I really did not care for the original beige color of the stands. Just waiting for the General finishes arm-r-seal IMG_1855.jpeg IMG_1852.jpeg IMG_1855.jpeg to dry before I apply paste wax.
 

timmydawg

New Around These Parts
Joined
Apr 26, 2021
Messages
20
#12
Thanks Bob,
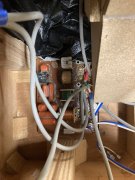
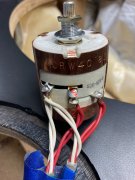
This site has a lot of really talented people that have inspired me to up my game, it took me awhile to learn that vintage electronics need to be repaired , rebuilt, and upgraded if possible . I would have upgraded the crossovers on the speakers but the board is encapsulated, check out the L-pads, IMG_1828.jpeg IMG_1827.jpeg all of the components seem to be of the highest quality.
This project has been a long time coming and I am really excited to find out how the speakers sound when I am finished!
Hopefully within the next two weeks the new insulation wont be here until the 18th
Cheers!
 

timmydawg

New Around These Parts
Joined
Apr 26, 2021
Messages
20
#15
Sorry to have left this without finishing up, I have been on strike the last 2 months so it gave me enough time to complete this project and a few others as well. I the new insulation was 1 inch blue denim material and very nice to work with. I put all the speakers back in the cabinets then took them for a little test drive in the back room, they sound really good but not enough separation.
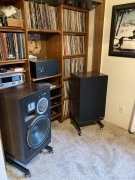
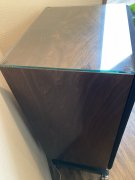
I ordered 1/4 inch glass for the tops because the wife always likes to accessorize the speakers. Moved the speakers into the living room 25' wide X 20' tall & plenty of separation, I had to order a pair of 10 gauge speaker wires 35' long & the wire was actually welded to the locking banana plugs.
Needless to say that the speakers really shined with the separation and being placed in the corners. In all it was a rewarding project and I was happy to be able to restore the P-580s
 

Attachments

Top