e30m3mon
Chief Journeyman
So much White Oak Porn out there! Looks great, Perry! Your years of working on military electronics are very impressive.
Raising the bar to a whole new standard
Raising the bar to a whole new standard

i am excited...


isnt that my name on the blue tape on the second from left??I also had fun with the 4 consecutive serial numbered Clairs with custom Powder Coat/Paint
View attachment 65453
")
isnt that my name on the blue tape on the second from left??
maybe you forgot my shipping address...
very nice...
hazard to your ears....lolYes, they were all yours. I lost your address and passed them on to a couple gents up here in the US.
Besides, your CR customs office would have deemed these amps "Hazardous" and confiscated them. Gotta protect the public.
It really matters to the performance outcome that you can achieveSo much White Oak Porn out there! Looks great, Perry! Your years of working on military electronics are very impressive.
Raising the bar to a whole new standard
Good point, the sponge needs to be clean and damp and it functions as a Steam Cleaner for your tip in between every component connection. Don't forget to tin your tip with a blob of fresh solder in between jobs when your iron will be idle more than a half hour and turn the heat down to about 300. This will help save these expensive tips. I've used the same tip for over a year, possibly 2.Just a couple of notes to Snif's soldering recommendations - all of which I agree.
- Install components so you can read their values. I hate it when I have to stand on my head (or use a mirror) to see the value.
- There are a bunch of how-to videos on soldering. Watch them.
- Clean, clean, clean - particularly your soldering pad (sponge) - I know Snif said this too. It's so true & the videos say the same.
Are those Cornscalas?Here was one of my fav's........ I did 6 WOPLS at one time (4 Clair Bro's 700 II's and 2 700B's). That was a BIG job. I had to get all 6 done and shipped so I could move from Bama back to Az.
View attachment 65452
Likewise, although I did not really fight it.
I use Kester 44 rosin core for soldering those big brass standoffs into the PL400 cap boards after swaging them in with the arbor press. Those boards do not have any electrical components on them so cleaning is easy.
Are those Cornscalas?
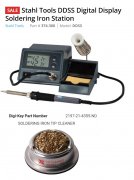
my station has a sleep mode...never saw that before...when you pick up the handle to solder, it pops back on...Good point, the sponge needs to be clean and damp and it functions as a Steam Cleaner for your tip in between every component connection. Don't forget to tin your tip with a blob of fresh solder in between jobs when your iron will be idle more than a half hour and turn the heat down to about 300. This will help save these expensive tips. I've used the same tip for over a year, possibly 2.
my station has a sleep mode...never saw that before...when you pick up the handle to solder, it pops back on...
I want a set! Those are my next speaker purchase. I'm probably going to purchase from Bob assembled... My woodworking is worse than my soldering :-/Yep, built them in the garage and used them for many years. Sold them to a customer that has 7 of my amps. I want to build another set.

Any tips on soldering the Dual sided WOB Control boards? and back pane board?
Too many variables, i.e tip size, wattage of iron, the persons experience soldering etc..... The tip size, should match the pad width, too much heat will F%$# up some boards. 80 watt iron MINIMUM for doing back planes..... Using 800 degrees is needed for the Pem nuts. And remember, those old PL boards were junk BEFORE they were brazed together by the old ladies at the factory. Get a piggy bank and save for your WOPL upgrades boys..... Take your time and be methodical. They also make practice solder boards, that's where you want to hone your skills and also using the correct materials makes the job easier. I soldered about 1000 boards before they turned me loose on fighter jet stuff. You just can't hurry it.
Don't worry about the component side of the board. If you are getting good flow, a proper meniscus/fillet, nice shiny joints on the solder side, skip the added heat required to get perfect joints on both sides. Technically, when soldering, the leads should be trimmed to 1 width of the component lead off the board before making the solder joint (For several reasons). We were graded (Military School) on the solder side. You cannot always get full flow through to the component side of the board because some ground planes or wider power busses tend to wick a fair amount of heat away from the joint. If you stay on the solder connection longer that about 3 seconds, you will run the risk of putting too much heat to the components. Look at a computer board which has been Wave Soldered, the component side are sometimes bare of solder. If the solder side of the board has a nice fillet, your mechanical connection is fine. Now, using heat sinks (like little Joe's), you can work on the joint a little longer but it takes experience to get it right and get it past the inspectors who passed or failed our work. Overheated solder is just as bad as a cold solder joint. As you solder, adjust your temp up or down to get the desired results. Many of us here can tell how bad the solder joints look on the solder side, just by looking at the mess on the component side. If you are working both sides of the board trying to get perfect joints, you may be putting too much heat on your components and while they may act fine, heat is our enemy and kills the component over time and may not last as long as a component soldered correctly. Some of us could set our irons on 800 and not cause any harm as we are on and off the connection in about 2-3 seconds but this takes experience. Many say I have a piss poor attitude for critiquing some of the solder jobs on these very pages but some of the shoddy soldering pings Joe's reputation as a top shelf Engineer. Some should have paid the extra cash to buy assembled boards. Joe spent years getting these boards perfected and one guy pissing and moaning about mr attitude blasting their terrible WELDING techniques can have lasting repercussions. If the solder joints look like they were done with "Big Bertha" (used for soldering generators on aircraft), I'll say something. If the dudes bad workmanship causes failures/issues (and it does), people see that and talk down the quality of the kits which is wrong. First thing Joe or Lee will ask for when helping troubleshoot one of those abortions is "WE NEED GOOD PICS". You can see in 2 seconds where to look with the overheated/solder balls/dirty boards/no attention to detail or directions and if yer asking for help from these guys, who are very busy, you need to be prepared to hear what you don't want to hear. I do just like my instructors/inspectors did to us in school..... I'll say "tear it apart and start over". Our solder techniques reflect on White Oak (at least in my book) and if it's butchered, I have no issues sayin so. This isn't directed at anybody, before school, my soldering was called "Micro-Welding" with the bigger the blob, the better the job....... Our solder jobs should make Joe proud. He spent the time to do it right, so should we. Sorry for the blah blah blah.