NEW PREAMP DESIGN

MarkWComer

Veteran and General Yakker
Joined
Nov 1, 2014
Messages
3,478
Location
Gaston, SC
Tagline
Victim of the record bug since age five
#61
Diff pairs are run on board to board connections inside switches and servers, not easy to implement but is done.

32G fiber channel and 56G IB are common PCB runs as well as Gen5 PCIe running nearly double that rate. When it has to span to a peer board, those runs can be quite long.

Cables and board are required to handle these transmission speeds. Length hurts so keeping runs as short as possible minimizes losses.
This only goes to show that there's a hell of a lot of stuff I just don't know!
Sometimes I make assumptions and open my mouth authoritatively on a subject for which I'm ignorant...
My knowledge increased, my thanks to you!
 

Gepetto

Administrator
Staff member
Joined
May 15, 2011
Messages
13,886
Location
Sterling, MA
Tagline
Old 'Arn Enthusiast
#62
This only goes to show that there's a hell of a lot of stuff I just don't know!
Sometimes I make assumptions and open my mouth authoritatively on a subject for which I'm ignorant...
My knowledge increased, my thanks to you!
Yeah Mark, a lot of incredible stuff goes on inside servers and switches these days...stuff thought impossible or impractical not that long ago. Your 5Gig WiFi is nothing compared to internal wiring bus routes.
 

GeorgeP

Journeyman
Joined
Mar 22, 2023
Messages
107
#63
Preamp update:
Options getting implemented, before releasing the design for Rev-2 PCBs.
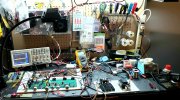
1. I designed a 10 watt / channel headphone amp. Drives speakers easily, and sounds great! To add the option, just removevthe smaller power supply board, and install the larger supply, and amplifier board with the heatsinks. See Pics.
The option is plug and play, with the preamp board. A headphone jack added to the right side front panel, and you can wire the bedroom speakers as well if you want to.
Distortion on optional power amp is DC OUTPUT CONNECTED WITH +/- 16VDC RAILS. Distortion is only 0.015% at 10 watts 10Hz to 20KHz. So...it sounds very clean and tight bass.This is the breadboard circuit verification. The pcb is laid out. I'll post that and updated schematic soon. Stay tuned! 20231230_184314.jpg . Heat sinks run just warm at full power.
Delayed mute so no power up/down thump noises.
 

Attachments

Gepetto

Administrator
Staff member
Joined
May 15, 2011
Messages
13,886
Location
Sterling, MA
Tagline
Old 'Arn Enthusiast
#66
Joe I see in 700b has a switch normal couple, direct couple? What is this about?
Hi Gary
The NORMAL position couples the preamp output to the PL700B amp input with a series capacitor in line with the signal (AC coupled). The DIRECT position bypasses that capacitor and directly couples preamp output to the PL700B amp input with NO series capacitor in line with the signal (DC coupled).

For reference, ALL PL400 amps do not have such a switch and are directly coupled to the preamp.
 

GaryCooper

Journeyman
Joined
Apr 28, 2023
Messages
116
Location
South Central VA.
Tagline
X usaf electronic tech.
#67
Hi Gary
The NORMAL position couples the preamp output to the PL700B amp input with a series capacitor in line with the signal (AC coupled). The DIRECT position bypasses that capacitor and directly couples preamp output to the PL700B amp input with NO series capacitor in line with the signal (DC coupled).

For reference, ALL PL400 amps do not have such a switch and are directly coupled to the preamp.
I realized 400 direct just wasn't sure why that is needed?
 

Gepetto

Administrator
Staff member
Joined
May 15, 2011
Messages
13,886
Location
Sterling, MA
Tagline
Old 'Arn Enthusiast
#68
I realized 400 direct just wasn't sure why that is needed?
Most use the direct position Gary, or bypass it altogether with a direct wire, like the PL400 is arranged. GUESSING that the normal position may have been used where a preamp had no output coupling cap and had DC offset or in commercial applications where distance separations may have caused ground shifts leading to DC offset. None of us were there so all we can do is guess.
 

GaryCooper

Journeyman
Joined
Apr 28, 2023
Messages
116
Location
South Central VA.
Tagline
X usaf electronic tech.
#69
Most use the direct position Gary, or bypass it altogether with a direct wire, like the PL400 is arranged. GUESSING that the normal position may have been used where a preamp had no output coupling cap and had DC offset or in commercial applications where distance separations may have caused ground shifts leading to DC offset. None of us were there so all we can do is guess.
Thank you Joe
Hope you have a safe and wonderfully profitable year. I might even full WO my pl400 if funds work out .
 

GeorgeP

Journeyman
Joined
Mar 22, 2023
Messages
107
#70
George how is it coming with your preamp?are we ordering yet
Thanks for your interest! I'm adding easy upgrade options, so the REV-2 PCB will easily accommodate them.
1. 10W / channel @ 8 Ohms and is a DC coupled Headphone / speaker output board with 30W +/- 15V DC REGULATED Power supply.
2. Peak reading Level indicators.

I thought plug and play upgrades may be of interest to some.
BTW, the prototyped Headphone amp sounds awesome with my 3-way bookshelf speakers. Great for bedroom.
I'm putting it all in the box (prototype) to make sure at all works mechanically and electrically before I release the boards.
Stay tuned. I'll update the entire schematic over the next few days and post it.
 

GeorgeP

Journeyman
Joined
Mar 22, 2023
Messages
107
#72
Hi Mark,
I'm very close to purchasing the REV-3 boards this week. I'm getting 3 sets. I added all options to the 1st REV build.
Its very tight mechanically, so I'm considering a 3.5" high rack type chassis. Costs me $175, blank with no machining. The price will go down with quantity, and so I think that is a better way to go, to make it easier to build.
1. I changed all the board connectors, for easier assembly, small screw terminal, no Molex pin crimping or soldering.
2. Added sub boards for all switches, with the Pheonix type screw connectors.
3. I added a sensory circuit that shuts down the high current regulators, if the speaker /headphone 10Watt amplifiers are not being used.
4. I added a switched processor loop selection. Can be used for a second line input also.
5. The preamp build can be customized to not include the four 10Watt amplifiers (no headphone amp) if you want. Upgrade options can be easily added anytime! All "plug-in" easy, and separately testable.
OPTIONS:
A. Preamp Only, FOUR LINE LEVEL OUPUTS.
B. Two 10Watt Amplifiers for just stereo speakers &headphones.
C. Four 10Watt Amplifiers for 4-channel with ambience driven speakers. Great for bedroom!
I'm going to Author the manual as I build the REV-3 for a clean no rework (hopefully) version.

IF ANYONE WANTS TO BE INVOLVED WITH THIS, I'LL INCREASE THE ORDER FOR THIS REV-3 board set. A COMPLETE BLANK BOARD SET IS $250 AND WILL COME WITH THE SPREADSHEET PARTS LIST THAT INCLUDES ALL DIGIKEY PART NUMBERS, REF DESIGNATIONS AND TOTAL QUANTITY NEEDED FOR EACH ITEM. I CAN KIT THE PARTS (NO PRICE YET) down the road, OR YOU CAN ORDER IT ALL FROM DIGI-KEY when you receive the board set. I WOULD SUGGEST BUILDING THE POWER SUPPLY FIRST, THEN THE MAIN PREAMP BOARD, THEN THE 10WATT AMPLIFIERS.
If you want, you can drill the chassis, or wait for the machined chassis this summer. I built my first one on a soft 1/4" thick insulating material holding the boards down with thumbnails! Lol. All tested before the chassis was spot drilled.

JUST SO YOU KNOW, I'M SPENDING APPROX $1000 FOR ONE CHASSIS AND PARTS FOR ABOUT 3 PREAMPS.
The first unit really sounds amazing...with the four channels in the test room. I'll add pictures tonight. It has the processor loop function reworked in... getting the connectors this weekend at a local Ham fest. The DBX-3 is in the loop...a nice expander I have.

I will be adding this preamp project to Ebay... The Ebay sales point with be "GPulse-Linear Audio Kits"...maybe get that going next week.
I need to concentrate on the assembly manual!
Thanks for your interest...it will be fun to build. If all goes well, I'll offer completed and tested boards (like Hafler and Dynaco did), and a completed tested preamp as well later.
Hope you like the plan and go with this initial blank board build. I'll help you along the way, and if anything is needed, I send all the info to complete it with you. That goes for anyone that wants to be involved. The board set will be ALL boards on one large PCB, separated by perforations that make separating each board pretty easy. I cut the connecting perforations with small wire cutters, then file the board edges flat for a nice appearance. That was the least expensive way to go... board sets all at once.
 
Joined
Apr 28, 2023
Messages
116
Location
South Central VA.
Tagline
X usaf electronic tech.
#73
Funny you went from making a modern 2000 replica to an integrated amp.
I want a basic preamp don't really need headphones or level indicators.
Either way I to am willing to order .
 

GeorgeP

Journeyman
Joined
Mar 22, 2023
Messages
107
#74
Hi All!
I just received the REV-A Board set.
I added the "OPTIONAL" features, as separate assemblies... so it's easy just to build only what you want in the design.
1. The 4 power amps/ headphone driver: If you don't want it or need it, build it that way. Simple. You can always add it later if you want. It's a separate connectorized assembly. Same goes for the Precision Peak power display assembly A3.
The power supply Assembly A5 is easily altered to shut down the high current regulators for the power amps. Just a jumper wire on a screw connector if power amps are noy used, or, you can opt to not place those particular components. Your choice. Note: the high current supplies automatically shut down if no speakers or headphone jack output are not plugged in. I would build the power supply up-full complete, so you can add the power amps later if you want that option.
So... For this new build... I'm building it step by step and authoring a detailed assembly manual with pictures, subassembly testing, and overall testing. The Power supply is perfect. +/- 24VDC for the preamp (Preamp has dedicated +/- 15 VDC Regulators on its PCB A1) and +/- 17.5 VDC High current regulators with enable/disable circuit work nice.
2. Next to build, the 4 channel 10Watt/Channel Power amp Board. This way, the full load on the power supply regulator section will be used.
3. The design now has sealed plug-in relays for source/external processor loop selection. I like my 3BX Compressor expander, so I added that loop function. You can connect anything you want... second source receive, or Loop receive. or... Add a recording device at the loop connection if you want. I felt that flexibility was important, but did not want to use switches that would require long traces and possible switch noise.
4. The Peak Bargraph display board is 90% built. Same process...step by step manual being authored. So far... perfect. I am using two types of solder now, and getting real good with the hot air soldering system. It's easy and I think it make better / cleaner connections. The SN63 is higher melting point used for all resistor and connectors. I use the SN42 lower temp solder for all chips, transistors and diodes. The solder past is "NO CLEAN" type and looks very NICE. I still use flux remover to really clean it up nice. I have a short video to see how the resistors solder up with the Hot air heat gun, but the clip is too big to upload here. I'm glad I decided to try it out. I can recommend the tools and solder past I used.
5. I should have the SN42 solder paste this week to finish up the display board. I notice that the resistors close to the chips, may desolder if the higher temp SN63 is used at the chips, so I'm waiting. This way... less temp stress on Chips, and other parts won't move. Thats the plane. I'll video the chip hot air installation with the lower temp solder and include it for your viewing. For now... the resistor hot air works great.
6. Next weel I will build the Preamp PCB A1. That will get tested with the already completed power supply A5.
7. Then the rear panel connector PCB A2 will be built. EASY.
8. Final tests will be done with all boards connected outside the chassis. Then you will easily see how easy it is to build and connect up, testing all separately first. Just like the old "Heath Kit" days... no way to fail and full support.
Attached is the assembly manual in process.
 

Attachments

Top