Little freshening up project 700 Bravo

Kma4444

Journeyman
Joined
Feb 8, 2020
Messages
78
So I gifted myself some things and Santa Eric delivered.

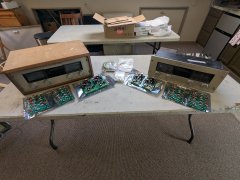
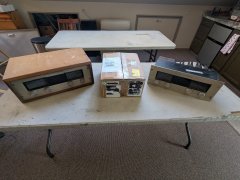
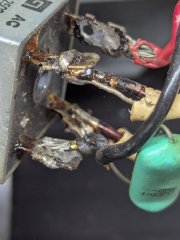
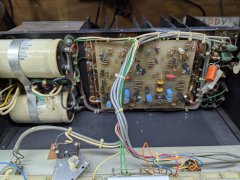
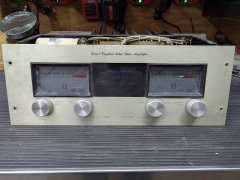
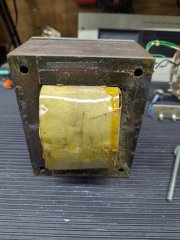
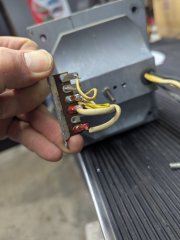
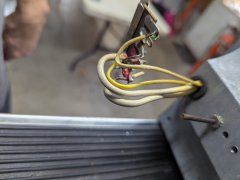
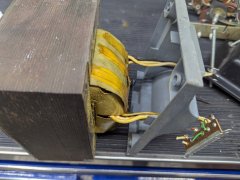
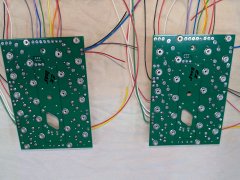
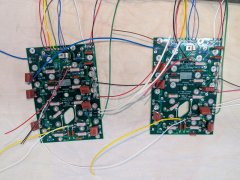
These were from my dad's estate and I have been delaying and delaying but I'm finally ready to do some things in earnest. Should be interesting, I'm pretty technical but not an electronics expert by any stretch. But for sure the one smart thing I've done in this project is deal with Eric. He did a awesome and quick job of getting the boards done to me the only thing I'm waiting on now is a package from White Oak. Then the comedy of watching me put it all together starts. I'll be sure to post a lot of pictures and let you guys know all the problems that I cause at Eric has to bail me out of.

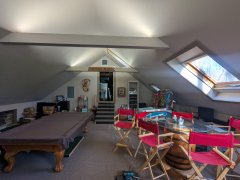
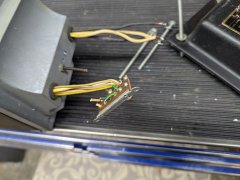
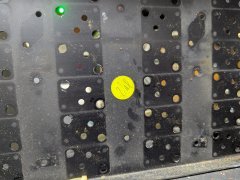
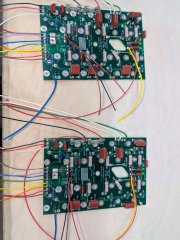
Also a picture of my little room they are going to live in.
 

Attachments

  • PXL_20251227_145356013.MP.jpg
    PXL_20251227_145356013.MP.jpg
    1.6 MB · Views: 23
  • PXL_20251227_145824039.MP.jpg
    PXL_20251227_145824039.MP.jpg
    2.5 MB · Views: 24
  • PXL_20251227_145350750.MP.jpg
    PXL_20251227_145350750.MP.jpg
    2.3 MB · Views: 23
Disassembly day for contestant #1. I picked this one for no particular reason. Lots of previous modifications and some ugliness. Anyone sees anything I should need to address please say so.
 

Attachments

  • PXL_20260103_184307839.MP.jpg
    PXL_20260103_184307839.MP.jpg
    1.9 MB · Views: 10
  • PXL_20260103_190204367.MP.jpg
    PXL_20260103_190204367.MP.jpg
    934.1 KB · Views: 10
  • PXL_20260103_184454304.MP.jpg
    PXL_20260103_184454304.MP.jpg
    1.8 MB · Views: 11
  • PXL_20260103_184448196.MP.jpg
    PXL_20260103_184448196.MP.jpg
    2.1 MB · Views: 9
  • PXL_20260103_184045108.MP.jpg
    PXL_20260103_184045108.MP.jpg
    1.2 MB · Views: 10
  • PXL_20260103_184022349.MP.jpg
    PXL_20260103_184022349.MP.jpg
    1.6 MB · Views: 10
  • PXL_20260103_183631750.MP.jpg
    PXL_20260103_183631750.MP.jpg
    949.6 KB · Views: 10
  • PXL_20260103_183527689.MP.jpg
    PXL_20260103_183527689.MP.jpg
    1.6 MB · Views: 9
  • PXL_20260103_183520082.MP.jpg
    PXL_20260103_183520082.MP.jpg
    1.4 MB · Views: 9
  • PXL_20260103_183509498.MP.jpg
    PXL_20260103_183509498.MP.jpg
    2.1 MB · Views: 9
Not sure how much of this is still Val's work. I was a bit disappointed in the wrong size washers on the transformer mounts, not to mention the full thread bolts
 

Attachments

  • PXL_20260103_194425585.MP.jpg
    PXL_20260103_194425585.MP.jpg
    2.3 MB · Views: 5
  • PXL_20260103_193758697.MP.jpg
    PXL_20260103_193758697.MP.jpg
    2 MB · Views: 5
  • PXL_20260103_194226461.MP.jpg
    PXL_20260103_194226461.MP.jpg
    2 MB · Views: 5
  • PXL_20260103_194240781.MP.jpg
    PXL_20260103_194240781.MP.jpg
    1.2 MB · Views: 5
  • PXL_20260103_194247752.MP.jpg
    PXL_20260103_194247752.MP.jpg
    1.1 MB · Views: 6
  • PXL_20260103_194255563.MP.jpg
    PXL_20260103_194255563.MP.jpg
    1.2 MB · Views: 6
  • PXL_20260103_194327483.MP.jpg
    PXL_20260103_194327483.MP.jpg
    1.5 MB · Views: 6
  • PXL_20260103_194331041.MP.jpg
    PXL_20260103_194331041.MP.jpg
    1.5 MB · Views: 5
  • PXL_20260103_194357512.MP.jpg
    PXL_20260103_194357512.MP.jpg
    1.9 MB · Views: 5
  • PXL_20260103_194541338.MP.jpg
    PXL_20260103_194541338.MP.jpg
    2.3 MB · Views: 5
Now to attach some wires to the new boards. Expecting a bunch of other goodies from WO soon. Nice to finally make progress. I have drug my feet long enough!
 

Attachments

  • PXL_20260103_193755558.MP.jpg
    PXL_20260103_193755558.MP.jpg
    2.4 MB · Views: 4
  • PXL_20260103_193448456.MP.jpg
    PXL_20260103_193448456.MP.jpg
    1.3 MB · Views: 4
Last edited:
If you kind folks, who know things, could take a look at these and critique, it would be most helpful. Don't worry, I don't have feelings anymore so let me have it!
 

Attachments

  • PXL_20260104_192233947.jpg
    PXL_20260104_192233947.jpg
    2 MB · Views: 11
  • PXL_20260104_192124232.jpg
    PXL_20260104_192124232.jpg
    1.9 MB · Views: 9
  • PXL_20260104_192217783.jpg
    PXL_20260104_192217783.jpg
    2.2 MB · Views: 8
  • PXL_20260104_192059870.jpg
    PXL_20260104_192059870.jpg
    2.2 MB · Views: 10
Remove the Orange wire at pin 5 from each backplane board.

You will be running separate wires from the control board pin 5 to the bulk cap bus bar assembly.

Also, continue heating wire to board solder joints until you see solder flow on the other side of the PCB.
 
Copy that, thank you very much sir. Was wondering about the time to allow the solder to flow. Didn't want to cook the board. I will go back and get it as you say.
 
Copy that, thank you very much sir. Was wondering about the time to allow the solder to flow. Didn't want to cook the board. I will go back and get it as you say.
I find that if my iron temp is suitable, I see full flow in under a second or so. Were I keeping heat on for 3 seconds, myself, I would worry about roasting components, the board and knocking foils loose (and consider turning up, or getting a hjgher wattage iron).The faster a clean joint is made, the less heat conducts into boards, components, insulation burnback on wires, etc. Proper flow is something you see, not time. (Granted, large parts, joints to chassis, etc. can take longer . . . but I thought we were talking about parts on a PCB, so responded accordingly.)
 
Yeah, not anytime is set on stone. If it conducts like it should , with just a dab of fresh solder, and then it melts incoming solder, then in a short jiffy, IF IT LOOKS RIGHT, I'm getting off that joint. Tim I understand the counterintuitive move of turning up the temp, but less time in contact is more productive than less temp. Learned that on those PL0171 boards and anything in a 3300, 2000, 3500...gotta MOVE IT on those boards....
 
Yeah, that and a gentle touch is my reason that I never seem to have any issues reworking old boards.

Hot, fast, and off for the win! (And good equipment helps as well . . . )
 
I had some problems to begin with but learned fast. That's how I stayed alive in the oilfield...
 
Back
Top