After being sidetracked by weather and other hobbies, I finally got her done. FYI:
1. Used 3/4" Red Oak Plywood for body (I think a finer grain wood like walnut might be better, if face trim is available)
2. Used 1/2-in x 3-in x 2-ft Red Oak Board for face trim
3. Cut 45 deg miters for sides (inside dimensions - 7-1/4" H x 19-1/4" W x 10-3/4" D)
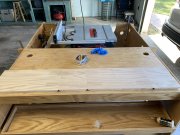
4. Layed flat with bevels down and taped together in assembly sequence
5. Flipped over so bevels were up, glued bevels, folded up into box and taped ends
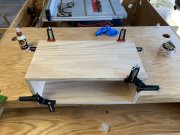
6. Applied some corner clamps to ensure it would be square
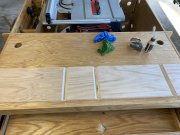
7. Measured, cut 45 deg miters for face trim and glued to front of box
8. When glue dried, used hand held router to cut 45deg bevel on face trim (if using hand held router, I suggest cutting the bevel in a couple of increasing passess to prevent the router from 'grabbing' the wood and causing some mistakes)
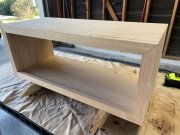
9. Sanded with 80 grit, then 120 grit and finished with 220 grit
10. Applied MinWax wood sealer
11. Applied two coats of MinWax Red Mahogany stain
12. Sprayed on three coats of laquer
Pics for your viewing enjoyment...
4.
View attachment 62289
5.
View attachment 62288
View attachment 62290
7.
View attachment 62291
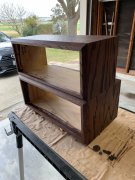
12. Finished product
View attachment 62293
Looks good with the series 2 and the Carver preamp. Thanks to Grapplesaw for providing the equipment. It's the 70's all over again here at the Warthogge house.
View attachment 62294


")