Russ' Phase Linear 700B Going Fully Comp!!!!!!!

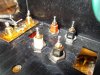
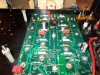
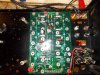
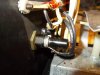
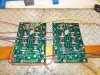
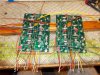
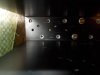
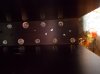
The white grease monster really had it's way with this one. Took awhile but it's clean. A closeup of the binding posts, for those of you using Don's board , the posts can be sucked clean of solder enough to take the 4-40 nut off an d reuse them.
 

Attachments

  • DSCN0321.jpg
    DSCN0321.jpg
    97.2 KB · Views: 36
  • DSCN0320.jpg
    DSCN0320.jpg
    97.1 KB · Views: 41
Holes drilled to relocate the AC mains in and fuseholder. Test fit on the board before wiring. Joe's assembly notes called for 4-40 scews to hold the thermoswitches and the head on the inside of the chassis with the nuts on the outside. I tried some 6-32 stainless allen heads and the head actually fits inside the thermoswitches footprint, so there's another option....
 

Attachments

  • DSCN0325.jpg
    DSCN0325.jpg
    98.1 KB · Views: 46
  • DSCN0324.jpg
    DSCN0324.jpg
    101.4 KB · Views: 45
  • DSCN0323.jpg
    DSCN0323.jpg
    100.5 KB · Views: 49
Ac and fuseholder in and soldered...
 

Attachments

  • DSCN0328.jpg
    DSCN0328.jpg
    88.3 KB · Views: 37
  • DSCN0327.jpg
    DSCN0327.jpg
    70 KB · Views: 41
  • DSCN0326.jpg
    DSCN0326.jpg
    85.2 KB · Views: 39
Power wiring done, signal wiring next..
 

Attachments

  • DSCN0330.jpg
    DSCN0330.jpg
    105.4 KB · Views: 44
Yep, trying to get this done and tested. Getting kind of excited Joe. Been anticipating this for a couple years....pluggin away...
 
Boards done..
 

Attachments

  • DSCN0332.jpg
    DSCN0332.jpg
    103.8 KB · Views: 44
Just countersinking does not allow installation without peeling some material off the insulators....I will enlarge the holes.
 
Just countersinking does not allow installation without peeling some material off the insulators....I will enlarge the holes.

That is what I guessed Lee. I first went up 4 thousands with a B drill which was still skiving material off. Getting to a C drill another 4 thousands up made it go. Still a lot of tolerance accumulation mating 2 parts that were produced with the precision that 40 years ago could render.
 
Amen Joe. Had to check though..if I would have countersunk half the thickness of the HS it would have went but then you have nothing holding tight.
 
Power went out last night just as I got to the third HS. On the 2 completed it took some wiggling and prodding but they all went without forcing them. Good cure there Joe...still held very snug in alignment with the extra slack...
 
Power went out last night just as I got to the third HS. On the 2 completed it took some wiggling and prodding but they all went without forcing them. Good cure there Joe...still held very snug in alignment with the extra slack...

Yes that extra 8 thousandths is what it needs to barely go Lee. Just carefully check for no metal filings left over and no burrs on the near side where the transistors mount.
 
I do Joe, I take a pin vise and a countersink and touch em up by hand...
 
Couldn't get my countersink mounted in my pin vise, but did find a long shank 13/32 that was uber-sharp. A little rat tail file work on the inside of the holes to smooth em up and hand dress the "push-through" and we're good to go.
 
WHOA NELLIE!!! Joe, I have a whole row that lacks about 5-7 thou . Take a look, we might have to relieve the chassis holes too.... Joe, what I did not do is lay the HS's on the bare chassis without the insulators, that might have given us an idea on how far the chassis is off from the HS holes.... Might drop the boards out and check that anyway...
 

Attachments

  • DSCN0336.jpg
    DSCN0336.jpg
    70.9 KB · Views: 35
  • DSCN0335.jpg
    DSCN0335.jpg
    71.7 KB · Views: 39
Last edited:
Joe my hole mics are at the shop and I just checked my "C" drill. It's endersized at .238. I have a "D" that mics .245. I'll try that and see where we stand.
 
Back
Top