You are using an out of date browser. It may not display this or other websites correctly.
You should upgrade or use an alternative browser.
You should upgrade or use an alternative browser.
Looking to upgrade to horns
- Thread starter roccus
- Start date
AngrySailor
Veteran and General Yakker
- Joined
- Oct 15, 2014
- Messages
- 3,419
- Tagline
- ---not quite right
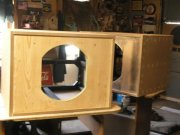
Glad you’re back at them.OK so I got the sub cabs back out and ready to begin to do the finish and final assembly on them. I have everything here to finish them off except the carpeting to cover the out side. I will use nylon auto loop type carpet to match the altecs....
View attachment 51256
mr_rye89
Veteran and General Yakker
Just skimmed through this thread. Good shit here. I love Altec and anything related. I'm trying to turn my 1202s into Model 19s.......or erm... Valencias with non shit crossovers........
roccus
Chief Journeyman
Ordered the carpet this morning... 2 square yards was $27 but $36 to ship! Got the fronts and front trim pieces all in finish prime today as well. Still much work to do but should go fairly quick. Still got to do the paint work, cut the stretched aluminum for the grills, and mount them in front of the spacers I had to make to clear the surrounds, bolt the woofers in, install the ports, attach the wheels, back cover, and trim moldings around the edges..... When fully assembled these things will weigh at least 100 lbs. each
roccus
Chief Journeyman
Well ran into a snag with the front trim pieces. I painted them last Wed. They looked good. I let them set till yesterday and put one on. My plan was to glue them as I did not want any screws to show, and screwing in from the back was not an option, as the pieces are only 1/2" thick which means to screw in from the back, the screws would not have a whole lot of meat to grab into and would most likely strip out if I tightened them very much. If any of you have ever worked with this MDF knows it is not very good for screws to hold into, it strips out and is not very strong.
Well I attempted to install the first piece. My plan was to put the glue on the back of the piece and clamp it to the baffle and let is sit overnight for the glue to dry. I did not want to clamp directly onto the trim piece as this would dent or mar the paint. So my bright idea was to use a piece of wood with a piece of paper towel between it and the trim piece to pad the wood on the paint. So I go out this morning, removed the clamps, and to my horror found the paper towel stuck to the paint! Even after 3 days the paint (acrylic enamel) is still to soft. I wet sanded, buffed ans polished the paint by hand. It took all the paper towel fibers off the trim ok, and it shines like a piece of glass, but the grain pattern or the paper towel is impregnated in the metallic of the paint. Where this is glued on I would not be able to remove it without damaging the piece to paint again, so my only option will be to carefully, painstaking mask it off to repaint.
Another thing I found is the trim pieces cupped a bit, I guess from the moisture of the primmer, sealer, and paint, on the one side. This to me would mean that the ends of the pieces will always have a pressure force to want to pull away from the front baffle. I'm thinking with the characteristics of MDF, down the road the ends of the trim pieces could pull away from the MDF, taking the top layer of the MDF with it. The only way I can see to fix this is put screws all the way through, which I wanted to avoid. I wanted a clean look. Sooo I got to do what I got to do to make this work. No way I want to use just regular oval head screws, I'm thinking allen head screws would look better but not wild about that idea, maybe either small carriage bolts with nuts from the back, paint the heads, or screws from the back with acorn nuts on the front..... So this is a bit of a set back, does not matter how much you plan and try to think things out, situations come up where you need to change something, and I have had a few on this build.
- Joined
- Jan 14, 2011
- Messages
- 75,904
- Location
- Gillette, Wyo.
- Tagline
- Halfbiass...Electron Herder and Backass Woof
And you seem to overcome all them in classy fashion..
mlucitt
Veteran and General Yakker
Drywall screws work well in MDF and being flat head, they can be slightly countersunk and filled in later with a bit of patching compound to make a flush surface.
roccus
Chief Journeyman
I did try dry wall screws from the back but being able to only go a bit over 1/4" into the trim piece they stripped out before I could put much torque on them. I wanted to paint the trim pieces before I put them on. Doing it this way meant I could not screw from the front to fill the holes. It's to late now I barely had enough paint left over from when I painted the 816 cabs and do not want to spend another $50 for another quart of paint. This is my first time for building anything like this.... so live and learn, right?Drywall screws work well in MDF and being flat head, they can be slightly countersunk and filled in later with a bit of patching compound to make a flush surface.
roccus
Chief Journeyman
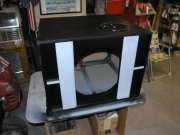
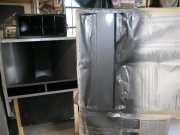
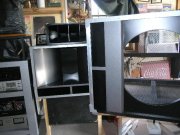
So got the screwed up trim piece repainted today, after decided to take the bike out to go for a bit of a ride and stop by the hardware store to get some screws. I decided I will use carriage small screws with the rounded heads, maybe grind the tops of the head more flat, then paint them with the gun metal grey. But the hardware store closes at noon on sundays so will go back tomorrow... I also put a pic here so you cam all see where I am going with these in trying to bring them in with the 816 cabs....


- Joined
- Jan 14, 2011
- Messages
- 75,904
- Location
- Gillette, Wyo.
- Tagline
- Halfbiass...Electron Herder and Backass Woof
Looking good Keith!!
Last edited:
roccus
Chief Journeyman
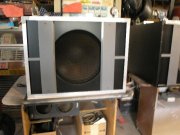
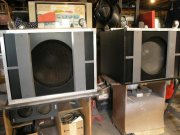
Couple last pics of the inside before I put the back covers on. Got the carpeting all done, have all the trim pieces on the bottom and corners done, and they are sitting on the floor on the wheels now. Just have to put the trim pieces around the top, button the backs up, and that should be it. I'm thinking I will be able to warp them up tomorrow.....
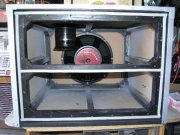
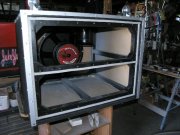


Couple last pics of the inside before I put the back covers on. Got the carpeting all done, have all the trim pieces on the bottom and corners done, and they are sitting on the floor on the wheels now. Just have to put the trim pieces around the top, button the backs up, and that should be it. I'm thinking I will be able to warp them up tomorrow.....
View attachment 51587
View attachment 51588
They look great Keith...
roccus
Chief Journeyman
Thanks JoeThey look great Keith...
Nice bracing, extremely stout!Couple last pics of the inside before I put the back covers on. Got the carpeting all done, have all the trim pieces on the bottom and corners done, and they are sitting on the floor on the wheels now. Just have to put the trim pieces around the top, button the backs up, and that should be it. I'm thinking I will be able to warp them up tomorrow.....
View attachment 51587
View attachment 51588
AngrySailor
Veteran and General Yakker
- Joined
- Oct 15, 2014
- Messages
- 3,419
- Tagline
- ---not quite right
Those look great man. I’m still happy with the speakers although I wouldn’t push them 400w each for hours on end. That said, 400w to those two cabinets will surely have the police there before you can heat the coils! 
pennysdad
Veteran and General Yakker
- Joined
- Feb 27, 2013
- Messages
- 3,728
- Location
- In witness protection.
- Tagline
- I've totally lost the plot....
pennysdad
Veteran and General Yakker
- Joined
- Feb 27, 2013
- Messages
- 3,728
- Location
- In witness protection.
- Tagline
- I've totally lost the plot....
- Joined
- Jan 14, 2011
- Messages
- 75,904
- Location
- Gillette, Wyo.
- Tagline
- Halfbiass...Electron Herder and Backass Woof
Dayam!!

