Kevin's PL400 Upgrade

mlucitt

Veteran and General Yakker
Joined
Jun 24, 2011
Messages
3,383
Location
Jacksonville, FL
#1
This thread will document another Phase Linear 400 upgrade. Because we are accumulating the knowledge on this site we may not have to document every build from now on but while I am not too busy it is nice to have a record and let the rest of the community chime in.

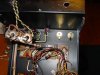
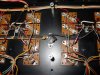
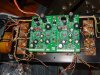
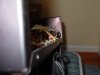
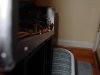
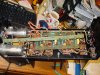
Here is the amp as I opened it up:
[attachment=0:30xc7876]Kevin's Amp as Received.jpg[/attachment:30xc7876]

More to follow...
 

Attachments

Gepetto

Administrator
Staff member
Joined
May 15, 2011
Messages
13,563
Location
Sterling, MA
Tagline
Old 'Arn Enthusiast
#3
I see it has the Sangamo 75V bulk caps in it. Those are toast from an ESR perspective.
 

mlucitt

Veteran and General Yakker
Joined
Jun 24, 2011
Messages
3,383
Location
Jacksonville, FL
#5
Kevin is getting some new inputs whether he likes it or not. I don't think he would have appreciated those 1/4 phone jacks...
[attachment=0:2u7tzmu7]Old and New Inputs.jpg[/attachment:2u7tzmu7]
 

Attachments

mlucitt

Veteran and General Yakker
Joined
Jun 24, 2011
Messages
3,383
Location
Jacksonville, FL
#6
I had to make a new mounting scheme for the WOA main board and it included some new holes (gasp!) in the chassis because the PL 400C board uses three mounting points.

[attachment=2:9b0m8c3w]Board Mounts.jpg[/attachment:9b0m8c3w]

[attachment=1:9b0m8c3w]Board Studs.jpg[/attachment:9b0m8c3w]

[attachment=0:9b0m8c3w]Board Mounted.jpg[/attachment:9b0m8c3w]
 

Attachments

ksrigg

Chief Journeyman
Joined
Jul 28, 2011
Messages
1,451
Location
Wise, Virginia
#7
Hey Mark...where do you get the terminal blocks for the PCB? Good looking stuff. Do you just make a mechanical connection, or are you adding some solder to the mix? Do I need some offsets for the PCB?
 

mlucitt

Veteran and General Yakker
Joined
Jun 24, 2011
Messages
3,383
Location
Jacksonville, FL
#8
The terminal blocks are Mouser P/N 651-1729209 for the 10 position ($3.65) and Mouser P/N 651-1729128 ($0.74); of course you need 2 of each. These are the narrowest blocks I could find. They have good shields around the base but they do crowd some of the components. Joe will be moving the attachment point holes closer to the edge of the board in the future and that will solve the problem. However, I have conducted resistance and voltage checks and there is no electrical short problem if you are careful with the installation (keep the component wires low, and tilt the connector slightly).

I prep the wires by stripping 1/8" of insulation and then tinning the ends with solder. You don't have to crank down on the screws, there are blocks inside that grab the wires. The Phoenix connectors are very nice.
 

laatsch55

Administrator,
Staff member
Joined
Jan 14, 2011
Messages
74,285
Location
Gillette, Wyo.
Tagline
Halfbiass...Electron Herder and Backass Woof
#9
They also have a rougth machined surface on the tension blocks so , as Mark said, you don't have to strip the setscrews to get em to keep the wires.
 

mlucitt

Veteran and General Yakker
Joined
Jun 24, 2011
Messages
3,383
Location
Jacksonville, FL
#10
Lee, I was successful at getting the chassis on one of these amps straight (or straighter) I was looking at the amp on the bench and looking at those 75V caps that Joe said were no good, and I thought they were about the right height...

So, I spread the caps apart to match the side rails on the inside edge of the back of the chassis and used them as a fulcrum. The transformer end is easier to hold down, so I just pushed down on the other end. Had to do it a few times, I didn't want to go overboard and kink the aliminum. After pressing down on first one corner and then the other, I think I got it.

Now, how do I straighten out the sides where the faceplate mounts?

Before:
[attachment=1:1xhzytrh]Chassis Before.jpg[/attachment:1xhzytrh]

After:
[attachment=0:1xhzytrh]Chassis After.jpg[/attachment:1xhzytrh]
 

Attachments

Gepetto

Administrator
Staff member
Joined
May 15, 2011
Messages
13,563
Location
Sterling, MA
Tagline
Old 'Arn Enthusiast
#14
Mark do you have a pair of duck billed vise grips? They work well on aluminum of the gauge that the PL chassis is. Be careful to put tape on the jaws to protect the anodize.
 

mlucitt

Veteran and General Yakker
Joined
Jun 24, 2011
Messages
3,383
Location
Jacksonville, FL
#15
I do have a pair of those vise grips but I will have to sand off the slag from iside the jaws because I use them to weld sheet metal with the MIG. Great idea!

Thanks,
Mark
 

laatsch55

Administrator,
Staff member
Joined
Jan 14, 2011
Messages
74,285
Location
Gillette, Wyo.
Tagline
Halfbiass...Electron Herder and Backass Woof
#16
Mark, are you talking about the S type bend that starts just past the boltflange on the sheetmetal chassis??
 

kevin

Forum Veteran and Hillbilly
Joined
Dec 22, 2011
Messages
1,422
Location
Wise VA
#19
WOW !!!!! Im just watching with real big eyes..... Cant wait to get my ears involved.... Sutton....... I really want to help you do one of these. Way above my head but i think ... " YOU CAN DO IT ''
 
Top