Thorens TD-125 MKII rework

Sunnbobb

Journeyman
Joined
May 25, 2023
Messages
229
Location
Mount Vernon, WA
Tagline
Bikes, baseball and big amps.
#1
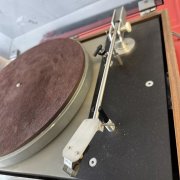
I'm reworking a Thorens TD-125 MKII turntable I recently picked up. The plinth, platter and mechanical were in pretty good shape. It had an odd tonearm with a SDT cartridge. The oscillation window wasn't right, the needle was missing from the cartridge, and the belt was probably original from the 70's.

Over the next month or so, I will be documenting the rebuild. Here are pictures of the unit as I received it.

th2.jpg
 

Attachments

Sunnbobb

Journeyman
Joined
May 25, 2023
Messages
229
Location
Mount Vernon, WA
Tagline
Bikes, baseball and big amps.
#4
So the overall plan is to install an early Micro Seiki MA-77 MkI tonearm with subweight, repair the oscillator mirror, recap the board, install new cables, replace the armboard, and clean up the plinth and dust cover. It will need new feet as well. I will be replacing the original three button faceplate with a two button since the MS tonearm has a lift mechanism. I'll also reinstall the ADK arm lifter, and install the MS armrest. I downloaded the mounting specifications for the tonearm, having spent the better part of a morning hunting them down.
 

Sunnbobb

Journeyman
Joined
May 25, 2023
Messages
229
Location
Mount Vernon, WA
Tagline
Bikes, baseball and big amps.
#5
I didn't take any pictures of disassembling the unit, but there's nothing too complicated about it.
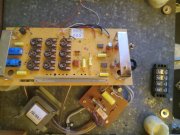
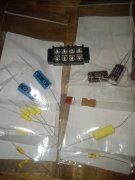
These units are well known for malfunctioning due to bad motor control capacitors. I tested the unit, and everything checked out, but I decided to go ahead and replace the troublesome caps anyway. I also cleaned and lubed the variable resistors. The op amps 8 pin LM741's, which should be fine for this old warhorse. All of the capacitors I removed were around 20%bout of spec. Here is a picture of the reworked board. 20241121_103654.jpg
 

Attachments

Last edited:

Sunnbobb

Journeyman
Joined
May 25, 2023
Messages
229
Location
Mount Vernon, WA
Tagline
Bikes, baseball and big amps.
#6
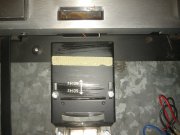
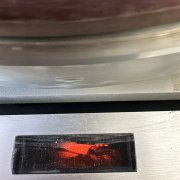
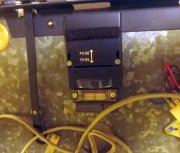
Next up was the oscillation mirror. I discovered it had fallen out of it's designated mounting spot, so I tore in and remounted it. In the photo below you can see where an old rubber isolation pad had disintegrated. I cleaned all that crusty white adhesive and placed the pad. The second photo shows what the widow looked like before I did the repair. The last picture shows the pad replaced and the mirror down in the well.
 

Attachments

Sunnbobb

Journeyman
Joined
May 25, 2023
Messages
229
Location
Mount Vernon, WA
Tagline
Bikes, baseball and big amps.
#7
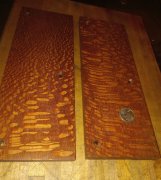
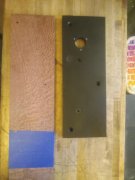
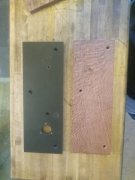
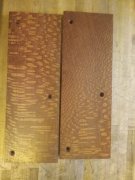
After removing the old tonearm and armboard, I decided I would replace the old armboard since I was going to need to redrill in order to mount the new arm. I decided to go with Leopard wood. I just finished making the blanks. I made and extra one since I already had all the tools and such out. I will be running slots in the underside of the board with rubber strips glued into the slots to reduce resonance. I'll do that once I have located the through hole for the new tonearm. The first picture shows the old arm board next to a piece of Lepoardwood ready for cutting and finishing. The second picture shows the new arm boards with mounting holes drilled, and the last picture shows the arm boards finished with 50/50 tung/teak oil. They still need two more coats of oil to get the luster up to snuff. I can'r decide which board I like better! 20241203_202204.jpg
 

Attachments

J!m

Veteran and General Yakker
Joined
Dec 24, 2019
Messages
10,848
Location
Connecticut
Tagline
BOT
#8
So the overall plan is to install an early Micro Seiki MA-77 MkI tonearm with subweight, repair the oscillator mirror, recap the board, install new cables, replace the armboard, and clean up the plinth and dust cover. It will need new feet as well. I will be replacing the original three button faceplate with a two button since the MS tonearm has a lift mechanism. I'll also reinstall the ADK arm lifter, and install the MS armrest. I downloaded the mounting specifications for the tonearm, having spent the better part of a morning hunting them down.
Tonearm should mount at 222mm same as Rega and the rest of the standard-length MS tonearms.
 

MarkWComer

Veteran and General Yakker
Joined
Nov 1, 2014
Messages
3,507
Location
Gaston, SC
Tagline
Victim of the record bug since age five
#11
Odd- 16, 33, and 45 rpm. No 78? Odd that they had 16 when so few were pressed, but 78 was de facto for a long time.
 

Sunnbobb

Journeyman
Joined
May 25, 2023
Messages
229
Location
Mount Vernon, WA
Tagline
Bikes, baseball and big amps.
#13
Use a proper two-point protractor and not the overhang. Then adjust anti-skate to get rid of sibilance on the inner grooves.
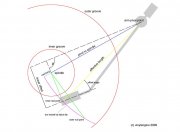
Thanks Jim! Here is the protractor I am using for this tonearm. I decided to go with Lofgren B setup. I used https://alignmentprotractor.com/2-point-protractor-generator to setup the protractor. Now I'm going to make a mounting plate for the tonearm, I hope to make it before the weekend. I'm also waiting for the new faceplate from Vinyl Nirvana. I haven't heard back from the owner since I first contacted him, so I don't know when he will bill and send the plate. As soon as I finish the mounting plate, I will drill the arm board, albeit, nervously!
 

Attachments

Sunnbobb

Journeyman
Joined
May 25, 2023
Messages
229
Location
Mount Vernon, WA
Tagline
Bikes, baseball and big amps.
#14
Use a proper two-point protractor and not the overhang. Then adjust anti-skate to get rid of sibilance on the inner grooves.
Jim there are five tiny wires coming out of the tonearm. l/r +, l/r -, and ground. I am thinking it would be nice to mount amale 5 din plug on the back of the unit, and then connect the preamp via a cable with a female 5 pin din plug on one end, and rca's and ground on the other (preamp) end. Have you seen any examples of this?
 
Last edited:

MarkWComer

Veteran and General Yakker
Joined
Nov 1, 2014
Messages
3,507
Location
Gaston, SC
Tagline
Victim of the record bug since age five
#15
Hey Professor! How you been?
I’m better than nothing!

Doing a lot of piddly stuff, nothing major. New neighbors moved into my sister’s house finally, got to talking about audio. He has a Bose SoundDock that worked intermittently, but the problem was a dab of paint on the barrel of the power plug breaking contact with the unit. He didn’t know that the battery pack was removable! Probably unobtainable these days, didn’t look for one, didn’t have it in my hands long enough to see if it would charge. Little sucker sounds great!
 

J!m

Veteran and General Yakker
Joined
Dec 24, 2019
Messages
10,848
Location
Connecticut
Tagline
BOT
#16
Jim there are five tiny wires coming out of the tonearm. l/r +, l/r -, and ground. I am thinking it would be nice to mount amale 5 din plug on the back of the unit, and then connect the preamp via a cable with a female 5 pin din plug on one end, and rca's and ground on the other (preamp) end. Have you seen any examples of this?
Lots of times. The Micro arm amy already have the jack on the bottom of the base- it was pretty standard to do so.

I went with two mini XLR plugs (as used for headphones) to have true balanced connection from tonearm to preamp, but that got scrapped as the preamp did not properly support balanced connection input.
 

8991XJ

Chief Journeyman
Joined
Oct 8, 2011
Messages
1,227
#17
Looks good. I need a new armboard. I have a 126 that I need to put a Magnepan arm onto but this tonearm is black and the armboards I have are black and I don't think that is going to be a useable combination. Maybe a nice chunk of walnut or something. Brother has a wood shop, now available most of the year with the mini split he put in with the spray in insulation for that former 3 car garage.
 

8991XJ

Chief Journeyman
Joined
Oct 8, 2011
Messages
1,227
#18
I’m better than nothing!

Doing a lot of piddly stuff, nothing major.
Wish I was better than nothing and could get anything done even if not major. I filled two trash cans with leaves yesterday and said that is enough. Cleared the driveway and around the Jeep before the wind today with yard waste day on Saturday. Goal accomplished!!
 

8991XJ

Chief Journeyman
Joined
Oct 8, 2011
Messages
1,227
#19
I am thinking it would be nice to mount amale 5 din plug on the back of the unit, and then connect the preamp via a cable with a female 5 pin din plug on one end, and rca's and ground on the other (preamp) end.
That would be a nice way to do it.

Things to consider with these suspended tables is the way the wiring leaves the tonearm. If it is a big heavy clump of wire, force fit somewhere under the table it will affect the suspension. Using short jumper wire, flexible and all from the tonearm to the DIN plug would be the way I would go. Then with the DIN plug you have your choice of many different high performance phono cables with a captured ground wire. These available for a c-note to thousands of bucks. Key is unrestricted movement of the suspended table.

Magnepan addressed this with the cable for their tonearm using a Amphenol plug to fit the tonearm (proprietary, don't go there) and a flexible 6-8" jumper that was connected to the main phono cable made of low capacitance wiring. You can see the jumper ending in the green plug near the RCA plugs. The connection to the main cable is under the wiring just to the upper left of the twist tie. For this tonearm, that connection was held by a cable support screwed to the underside of the turntable.

You won't need that because you will jump to the DIN plug on the back panel. Beautiful simplicity with that design. If you use a common DIN plug on the tonearm end of the jumper you can swap tonearms.
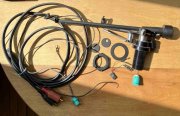
Parts CA 2.jpg

The wire I found that does a most excellent job of this jumper work is Cardas 33x4 Shielded Tonearm Wire. I found Mogami makes a W2739, 33Gax4 Shielded wire that is perfect, too. Very flexible and with the shield it carries the ground and keeps the EMI and RFI off the signal wires. Two sources are Cardas at partsconnexion in Canada and eBay UK for Mogami (I got no idea if they are the same cable). The bay stuff is way cheaper even with shipping.
Cardas 4 x 33awg Original Series w/Shield Tonearm Wire
Mogami 2739 - Ultraflexible Miniature Cables - 2.1mm OD - 4 Core & Screen | eBay

When I installed this wire, I used the shield as a strain relief, soldering all the signal wires in place with slack in them and soldering the shield wire short so it would take any strain on the wire and keep the 33Ga signal wires from breaking. I needed to change one of the Amphenol connectors in one of my Magnepan arms since the original connector is not repairable and not available. I used a DIN in the arm and at the end of the jumper cable on the original phono cable using the Cardas I believe, as I could not find the W2739 which was recently listed on ebay UK (last few years, someone mentioned it on a board after my discussion of this fix I made.)

As to your choice of Male and Female and where they go, look at phono cables. I would get a standard phono cable since they are generally available and mount the DIN connector needed for that on the table. The Grace tonearms are backwards and finding a phono cable for one is not as easy as getting a normal DIN phono cable.
 

J!m

Veteran and General Yakker
Joined
Dec 24, 2019
Messages
10,848
Location
Connecticut
Tagline
BOT
#20
Standard is "male" DIN connector on the arm; it could also be on the back of the table plinth if you wanted.

Check specs as I think it may be the same pin spacing as a "MIDI" connector, which opens up more possibilities from a form-factor standpoint.
 
Top