mlucitt
Veteran and General Yakker
I am pleased to announce that I have purchased a new amplifier kit from White Oak Audio Design, the Model ONE. While there are some recognizable features, such as the PL700 Backplane Boards and Heat Sink Fins; this is a completely new design, engineered by Joe King (Gepetto). He can provide more information about the concept, the design goals, and the specifications. I will be doing the assembly and feedback, by his request, for continuous process improvement in real time. But I need your help...
I will be providing a narrative and pictures of the first-time assembly process, and I would appreciate constructive criticism and comments as I go through the steps of assembly. Please do not ask about availability and prices, that will be the domain of WOA, I am just the Technician. There are three parts to the Model One Kit:
1. Customer supplied parts. These are parts that are available at Mouser, non-stocked at WOA, or too heavy for WOA to ship (transformers).
2. The Mechanical Kit. This is the sheet metal and hardware that forms the cabinet of the amplifier including the Faceplate.
3. The Electronics Kit. This contains the eight PCBs and all the components to assemble them. Documentation (BOMs, Wire Lists, and tips) will be provided.
Additionally, if you want to build one, or more, of these kits you will need some special tools. More on that later.
Let me start out by saying this will be a monster of an amplifier. The main toroidal transformer is rated at 1500VA at 475V and weighs 35 pounds by itself. The Faceplate is over 1/4" thick, 25% thicker than a PL700 faceplate. There are eight printed circuit boards to be assembled, all made in the USA. Enough of that.
Here are some pictures, "In the Beginning..." The Mechanical Kit:

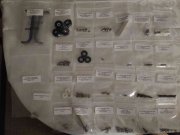
Mechanical Kit Hardware (26 Bags)

The Electronics Kit (113 bags) The Backplane Boards are already assembled and not shown.

The moderators may want to make this a separate Forum, it's up to them. This is my plan:
1. Assemble the two Meter PCBs so that I can attach the Meters to the Faceplate and put it in a safe place until needed for attachment.
2. Assemble the Power Control PCB, this is the "Brains" of the amplifier and sits in the middle of the chassis. Many wires run to this board, so it is critical.
3. Assemble the Output Relay PCB because Then I can attach it to the inside rear of the chassis, out of the way.
4. Finally, assemble the two WOA-1000C Amplifier PCBs because I previously had the two Backplane Board PCBs assembled and waiting in anticipation.
I will be happy to answer questions regarding the parts, assembly process, and the logistics involved with building this awesome beast. This has become my full-time obsession, I have retired from doing WOPLs, Phase Linear upgrades, or supplying Phase Linear parts (except for previous customers).
Let the process begin...
I will be providing a narrative and pictures of the first-time assembly process, and I would appreciate constructive criticism and comments as I go through the steps of assembly. Please do not ask about availability and prices, that will be the domain of WOA, I am just the Technician. There are three parts to the Model One Kit:
1. Customer supplied parts. These are parts that are available at Mouser, non-stocked at WOA, or too heavy for WOA to ship (transformers).
2. The Mechanical Kit. This is the sheet metal and hardware that forms the cabinet of the amplifier including the Faceplate.
3. The Electronics Kit. This contains the eight PCBs and all the components to assemble them. Documentation (BOMs, Wire Lists, and tips) will be provided.
Additionally, if you want to build one, or more, of these kits you will need some special tools. More on that later.
Let me start out by saying this will be a monster of an amplifier. The main toroidal transformer is rated at 1500VA at 475V and weighs 35 pounds by itself. The Faceplate is over 1/4" thick, 25% thicker than a PL700 faceplate. There are eight printed circuit boards to be assembled, all made in the USA. Enough of that.
Here are some pictures, "In the Beginning..." The Mechanical Kit:

Mechanical Kit Hardware (26 Bags)

The Electronics Kit (113 bags) The Backplane Boards are already assembled and not shown.

The moderators may want to make this a separate Forum, it's up to them. This is my plan:
1. Assemble the two Meter PCBs so that I can attach the Meters to the Faceplate and put it in a safe place until needed for attachment.
2. Assemble the Power Control PCB, this is the "Brains" of the amplifier and sits in the middle of the chassis. Many wires run to this board, so it is critical.
3. Assemble the Output Relay PCB because Then I can attach it to the inside rear of the chassis, out of the way.
4. Finally, assemble the two WOA-1000C Amplifier PCBs because I previously had the two Backplane Board PCBs assembled and waiting in anticipation.
I will be happy to answer questions regarding the parts, assembly process, and the logistics involved with building this awesome beast. This has become my full-time obsession, I have retired from doing WOPLs, Phase Linear upgrades, or supplying Phase Linear parts (except for previous customers).
Let the process begin...
