
- Joined
- Apr 28, 2013
- Messages
- 2,777
I wanted the ability to use my current speaker cables with these vintage ESS speakers but alas, old- school binding posts that only accept bare wires or pins were not going to work with my banana plugs.
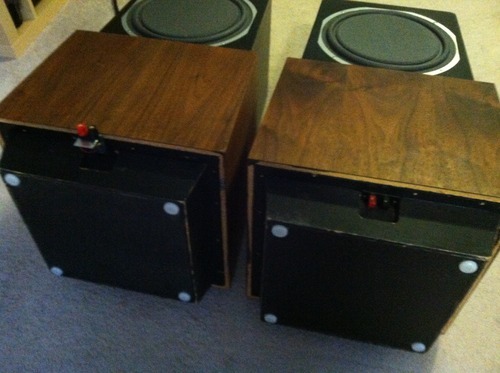
Speaker on the left has been modified, the speaker on the right still with factory connectors installed. This was an easy mod that most of you could do to your own speakers with some basic tools if you wanted to tackle this project.
Here are the supplies and tools:
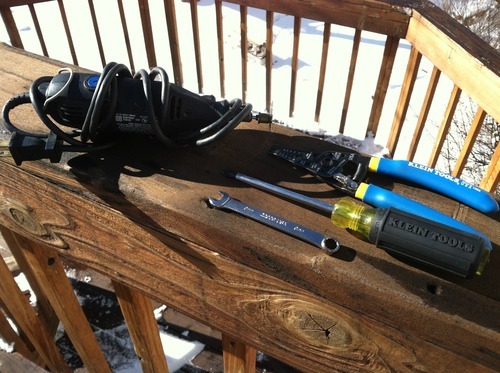
Phillips screwdriver.
wire strippers.
wrench(pliers, nut driver, socket set, etc.)
Rotary tool with cutoff wheel- hacksaw would work, too.
Although my brackets came with holes that were a perfect match for my binding posts, a drill or drillpress will get you similar results.
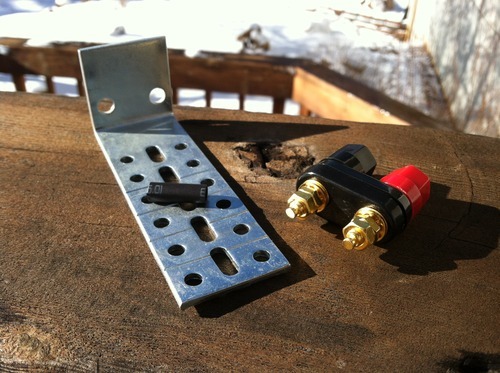
2- pairs of binding posts like these here.
2- small brackets- really anything that you can mount the posts through and attach to the speaker cabinet will work; metal, wood, plastic.
1 inch of 5mm heatshrink- I needed something to insulate the binding posts from shorting against the metal bracket and this was easy and convient for me to use. If you use a non- conductive material, you won’t need to worry about this step for the mod.
….and here we go!
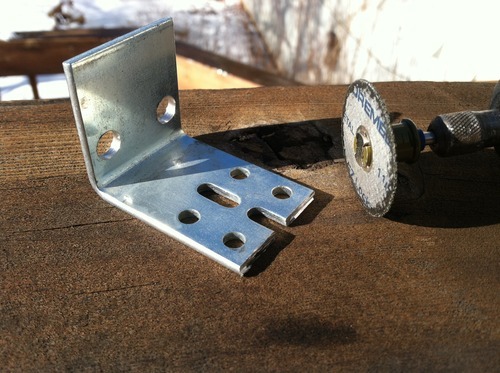
1. Cut mounting bracket to correct length and/ or width:
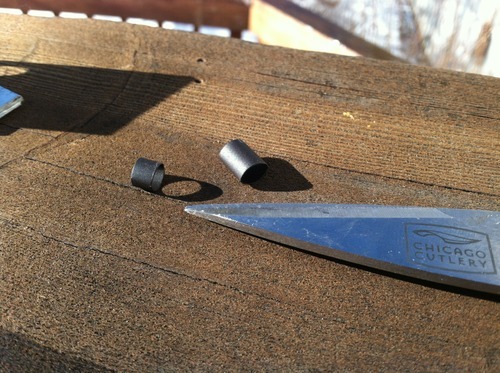
2. Cut four(4) 1/8”ish pieces of shrinkwrap for between the binding post shafts and brackets:
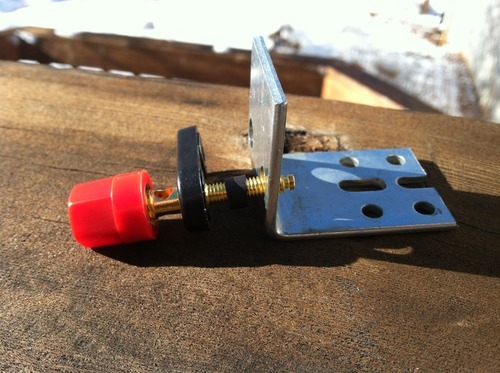
3. Install the binding posts:
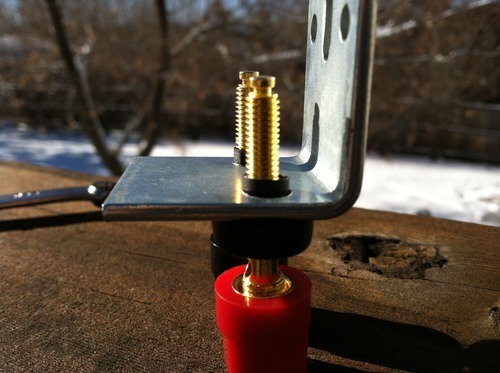
Make sure that the metal posts no- touchy the metal bracket………not good for that to happen.
…all ready to be installed on the ESS.

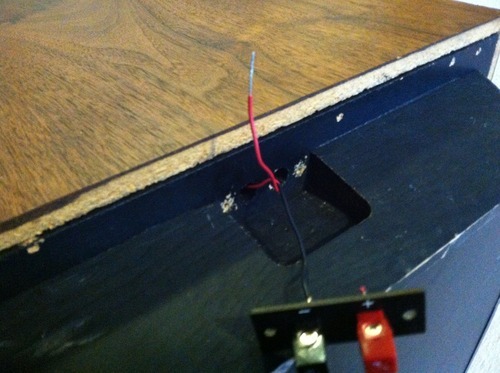
4. I found that the fine folks at ESS left me enough internal wiring that I did not need to open up speakers to gain enough cabling to install the bracketed assembly.
5.Gulp…….cut ONE(1) wire, strip it, and twist around the other wire. This will keep your wire from retreating into the speaker cabinet.
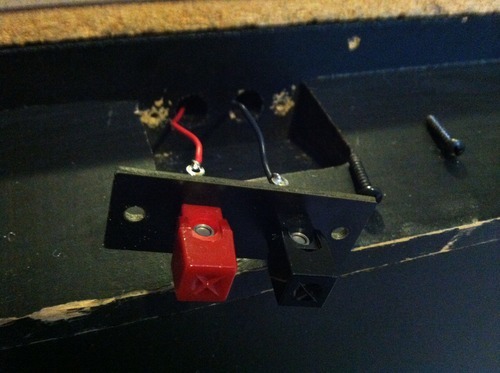
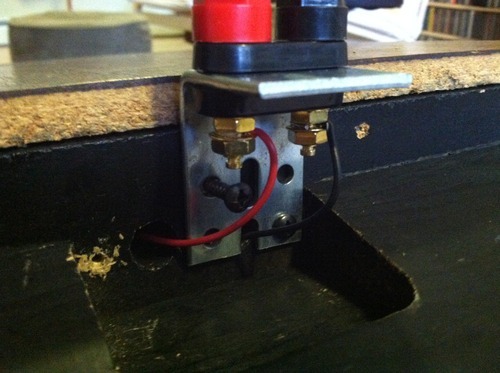
6.Connect wire to post with hardware or solder it into place:
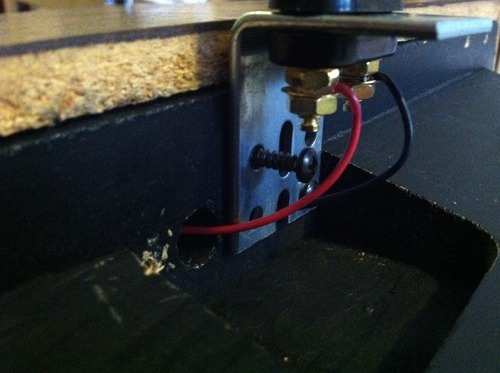
7. Cut the second wire, strip it and attach to other binding post like you did with the first:
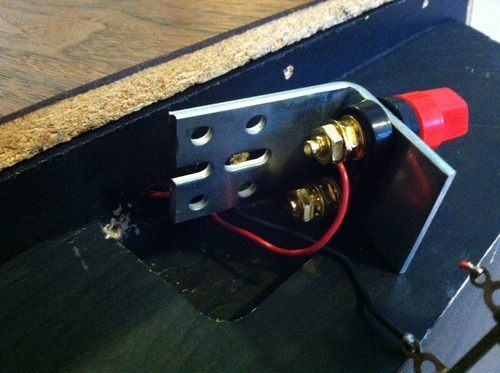
8. Attach the bracket to the cabinet using the old hardware. I was able to reuse one of the original mounting bracket holes from where the factory one was installed.

Plug in your speaker cables and enjoy your Hi- Fi. Hope this was of some help or motivation to ya’ll.
Speaker on the left has been modified, the speaker on the right still with factory connectors installed. This was an easy mod that most of you could do to your own speakers with some basic tools if you wanted to tackle this project.
Here are the supplies and tools:
Phillips screwdriver.
wire strippers.
wrench(pliers, nut driver, socket set, etc.)
Rotary tool with cutoff wheel- hacksaw would work, too.
Although my brackets came with holes that were a perfect match for my binding posts, a drill or drillpress will get you similar results.
2- pairs of binding posts like these here.
2- small brackets- really anything that you can mount the posts through and attach to the speaker cabinet will work; metal, wood, plastic.
1 inch of 5mm heatshrink- I needed something to insulate the binding posts from shorting against the metal bracket and this was easy and convient for me to use. If you use a non- conductive material, you won’t need to worry about this step for the mod.
….and here we go!
1. Cut mounting bracket to correct length and/ or width:
2. Cut four(4) 1/8”ish pieces of shrinkwrap for between the binding post shafts and brackets:
3. Install the binding posts:
Make sure that the metal posts no- touchy the metal bracket………not good for that to happen.
…all ready to be installed on the ESS.
4. I found that the fine folks at ESS left me enough internal wiring that I did not need to open up speakers to gain enough cabling to install the bracketed assembly.
5.Gulp…….cut ONE(1) wire, strip it, and twist around the other wire. This will keep your wire from retreating into the speaker cabinet.
6.Connect wire to post with hardware or solder it into place:
7. Cut the second wire, strip it and attach to other binding post like you did with the first:
8. Attach the bracket to the cabinet using the old hardware. I was able to reuse one of the original mounting bracket holes from where the factory one was installed.
Plug in your speaker cables and enjoy your Hi- Fi. Hope this was of some help or motivation to ya’ll.
Last edited:
